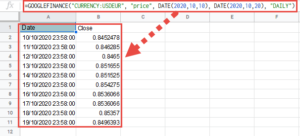
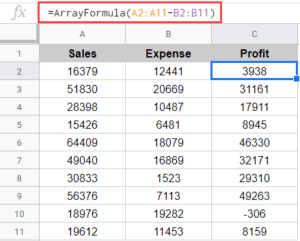
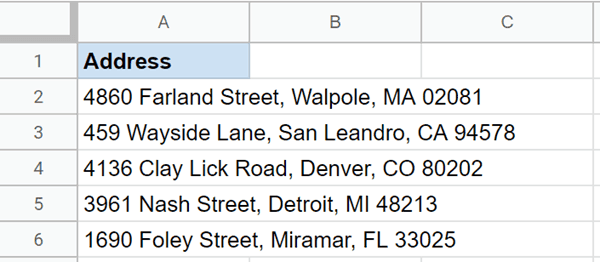
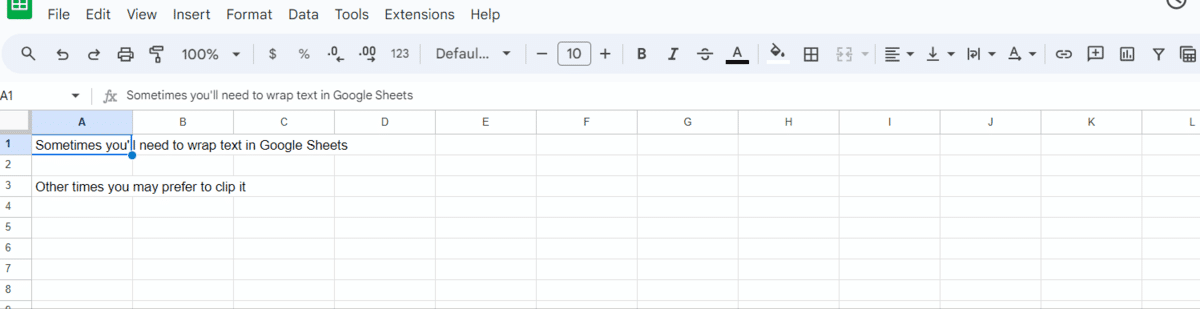
When you have a long sentence or long strings in a cell in the Google Sheets app, you will find that it overflows to the adjacent cells on the right (like below). For this reason, you should learn how to wrap text in Google Sheets, especially if you don’t need to see the entire text.
Keep reading as I walk you through the different text-wrapping methods in Google Sheets.
Table of Contents
Quick Guide: How To Wrap Text in Google Sheets

The process of wrapping text in Google Sheets is simple. Follow the steps below to learn the quick version:
- Select the cell range you want to wrap.
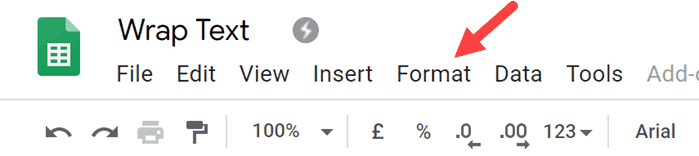
- Click “Format” on the toolbar at the top.
- Place the cursor on the text wrapping icon.
- Select “Wrap” in the drop-down menu to wrap the selected cells.
Of course, several alternative methods to wrap text in Google Sheets exist. Keep reading as I walk you through them.
How To Wrap Text in Google Sheets
Let’s take a look at the other text-wrapping methods in Google Sheets:
How To Wrap Text In Google Sheets With the Format Menu
I may sound like a broken record when I say it’s easy to wrap text in Google Sheets, but it really is! You’ll agree with me after reading the step-by-step instructions below to wrap text via the format icon.
- Select the cells that you want to wrap.
- Click the “Format” option in the menu.

- Move your mouse to the “Wrapping” option.

- Select “Wrap.”
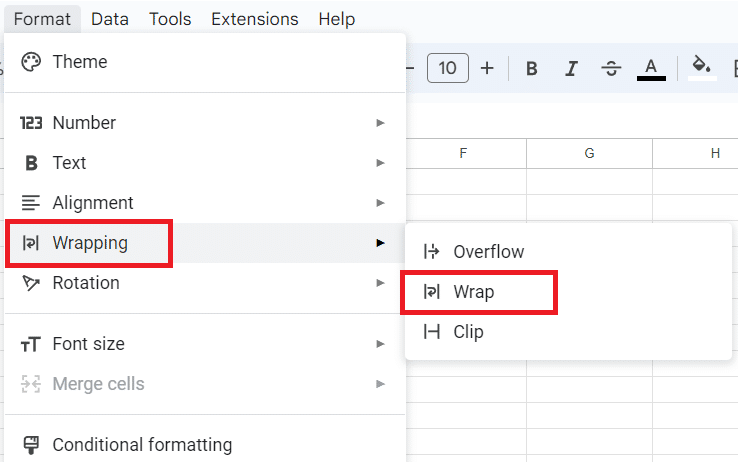
And that’s it! This will instantly wrap the text in your selected cells.
How To Wrap Cells in Google Sheets With the Toolbar
Another method is using the Google Sheets toolbar, which is just below the “Menu” options.
Follow these steps to access the text wrap icon via the toolbar:
- Click on the “Wrap Text” icon in the toolbar.
- It is the middle option when you click the “Text Wrapping” icon.
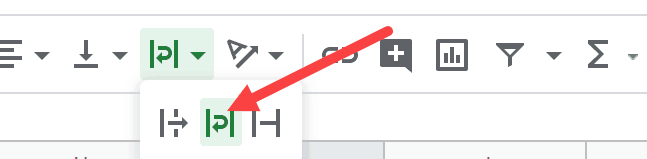
Note: The text wrap button works as a toggle. You can enable and disable it with the same steps mentioned above.
Video on Formatting Cells to Wrap Text
How Does Google Sheets Wrap Text?
When the content of a cell is wrapped, Google Sheets will try to fit the cell’s content within the same cell’s boundaries or column width. The cell width within the columns determines this. So, if your column width is long enough to fit the text in one line, Google Sheets will do that.
Related: How To Autofit Column Width in Google Sheets
However, if your column width is too short, it will wrap the cell’s content within the same cell (by splitting it into multiple lines in the same cell) so the text doesn’t overflow.
When the text is wrapped, Google Sheets adjusts the cell’s height to fit the content automatically, keeping your data organized.
Alternatively, if you don’t want your text to overflow or wrap, choose the “Clip” option, which is accessible under the text wrapping button.
This will clip the text so it doesn’t overflow into the adjacent cells. It is a useful feature when you want to see part of the text but don’t want it to overflow. Common examples are long URLs, email addresses, or phone numbers.
The convenient thing is that using the “Clip” option will not delete any text. It just hides any text that was overflowing
How To Create a Keyboard Shortcut to Wrap Text Using Macros in Google Sheets
Another way to use the “Text-Wrapping” option is to use macros while working on a spreadsheet.
A macro records mouse clicks and keystrokes that you can edit. It can also be described as a small program that automates tasks in a spreadsheet, which means you can create your wrap text in the Google Sheets shortcut.
Follow the steps below to learn how to create a keyboard shortcut to wrap text using macros in Google Sheets.
Step 1: Select the cells you want to wrap.
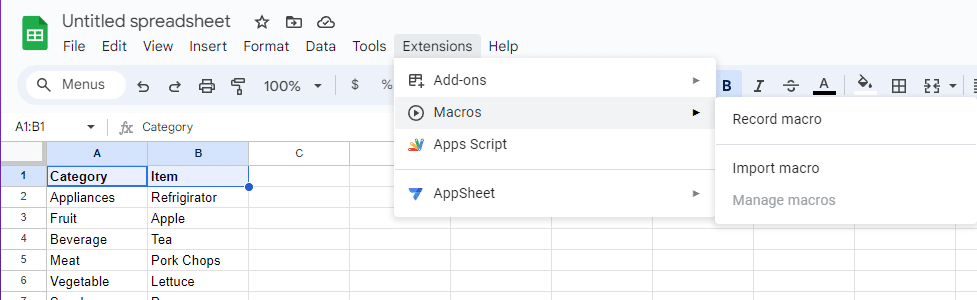
Step 2: After you have selected your cells, navigate to the Google Sheets toolbar and select “Extension.”
Step 3: A pop menu will appear. Select “Macro” from the pop-up menu, then click “Record Macro.”
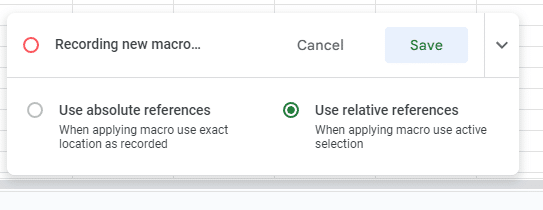
Step 4: Another pop-up menu will appear at the bottom middle sector of the screen. Select “Use reflective references” from the options.
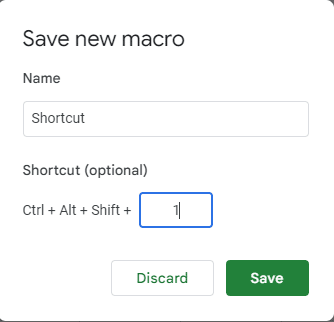
Step 5: The next step is to name and assign a shortcut key number, then click “Save.”
For Mac users, the keyboard shortcut is Command + Option + Shift + your preferred number.
The alignment settings are what carry the text wrapping option. Apart from text wrap, the alignment setting in Google Sheets also contains horizontal alignment, vertical alignment, indentation, and merge cells.
How To Wrap Text in the Google Sheets Mobile App
You can also wrap text on your mobile device. While the process is slightly different, it is just as easy. Here’s how to wrap text in Google Sheets via a mobile device:
- Tap the cell you’d like to format or entire columns or rows by selecting their letter or number.
- Tap the “A” formatting button.

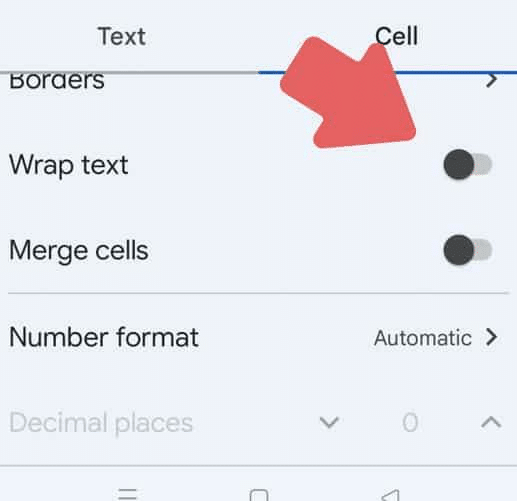
- Tap the “Cell tab” and scroll down until you get to “Wrap” text.
- Click the toggle that turns Google Sheets text wrap on.


Why Isn’t My Text Wrapping Working in Google Sheets?
Google doesn’t automatically enable cell wrap anymore. Therefore, you must turn on the text-wrapping feature manually.
If you followed my instructions above, then the function should be working. If not, try reloading your page.
Frequently Asked Questions
How Do You Wrap Text in Google Sheets?
The simplest way is to:
- Highlight the applicable cells.
- Click the text wrap shortcut in the toolbar.
What Is the Shortcut for Wrap Text in Google Sheets?
You have to highlight the applicable cells and press ALT + Enter.
Why Is Text Not Wrapping Not Working in Google Sheets?
Text wrapping is not automatically enabled in Google Sheets. Therefore, it is more likely that the “Clip” or “Overflow” function will be enabled as your default setting.
You can change the setting via the “Format” menu using the keyboard shortcut ALT +Enter if you want to change the setting.
Learn More About Google Sheets
Now that you know how to wrap text in Google Sheets, you may want to check out our guide to adding a new line to the same cell in Google Sheets.
Related: