Google Slides is a powerful presentation tool, but new users might find it a bit overwhelming. In addition to creating professional, visually-appealing presentations, you can use the auto-play feature to make them more dynamic.
To make Google Slides play automatically, you can select “Slideshow” in the top-right corner of your screen. Move your cursor to the menu bar and click on the “three dots” icon. Select “Auto-play” and choose a time delay. You can also select the “Publish to web feature” to make your presentation play automatically (more on that later).
In this article, we’ll provide greater details – and alternative methods – to illustrate how to make Google Slides play automatically. We’ll also add a few how-tos on making looping presentations.
Table of Contents
Start by Creating Your Google Slides Presentation
Before you can enable Google Slides’ auto-advance feature, you’ll first need to create a presentation. Every presentation will vary, depending on your design preferences and content, but these are the basic steps to start one from scratch.
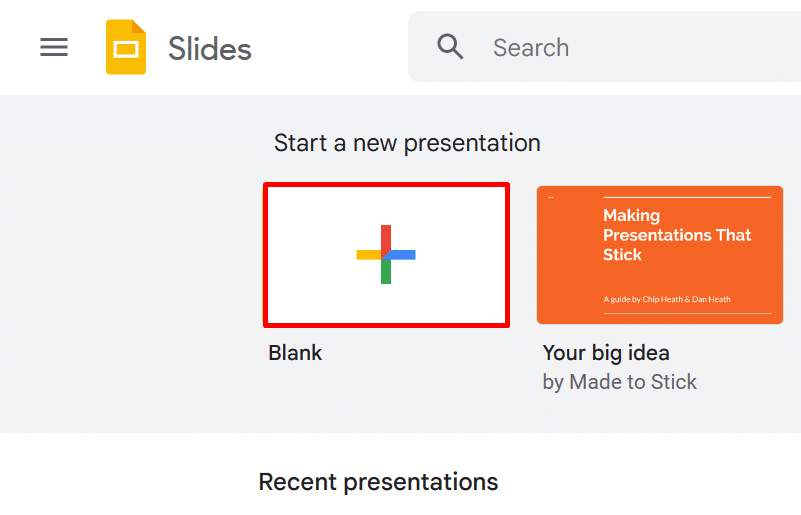
1. Go to Google Slides and select a Blank presentation.
2a. Add slides by clicking on the “New slide” button (represented by a plus symbol on the toolbar).
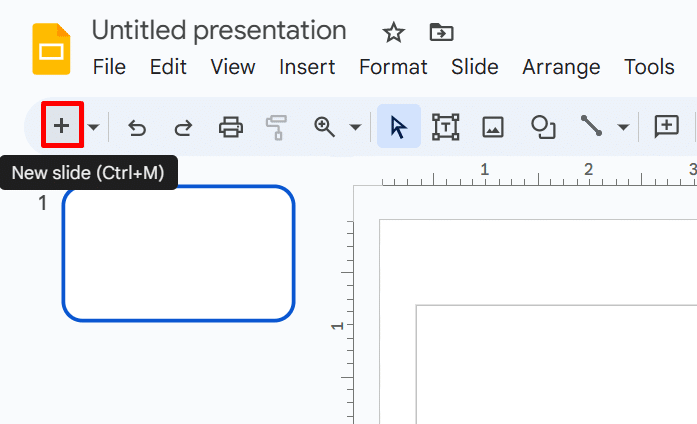
2b. Alternatively, you can also use a keyboard shortcut to add slides: Ctrl + M (or Command + M for macOS).
3. Begin adding your presentation elements: title, icons, GIFs, charts, graphs, etc.
Related: How to Add a GIF to Google Slides (Easy 2-Minute Guide)
How to Make Google Slides Play Automatically
Enabling your presentations to play automatically is handy when you need to display them for long durations. For example, it’s an excellent choice for a greeting slideshow on a lobby television. There are two methods to get Google Slides to play automatically.
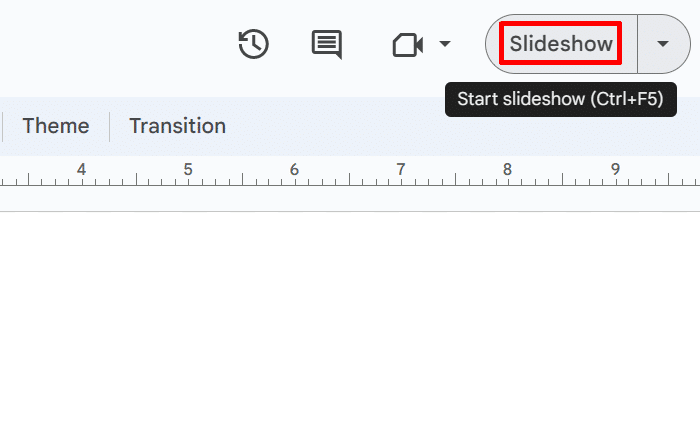
Google Slides Autoplay Using Slideshow
This is the easiest way to enable Slides to play automatically. One caveat: You’ll have to manually set it every time you want to present your slideshow. Here’s how to do it:
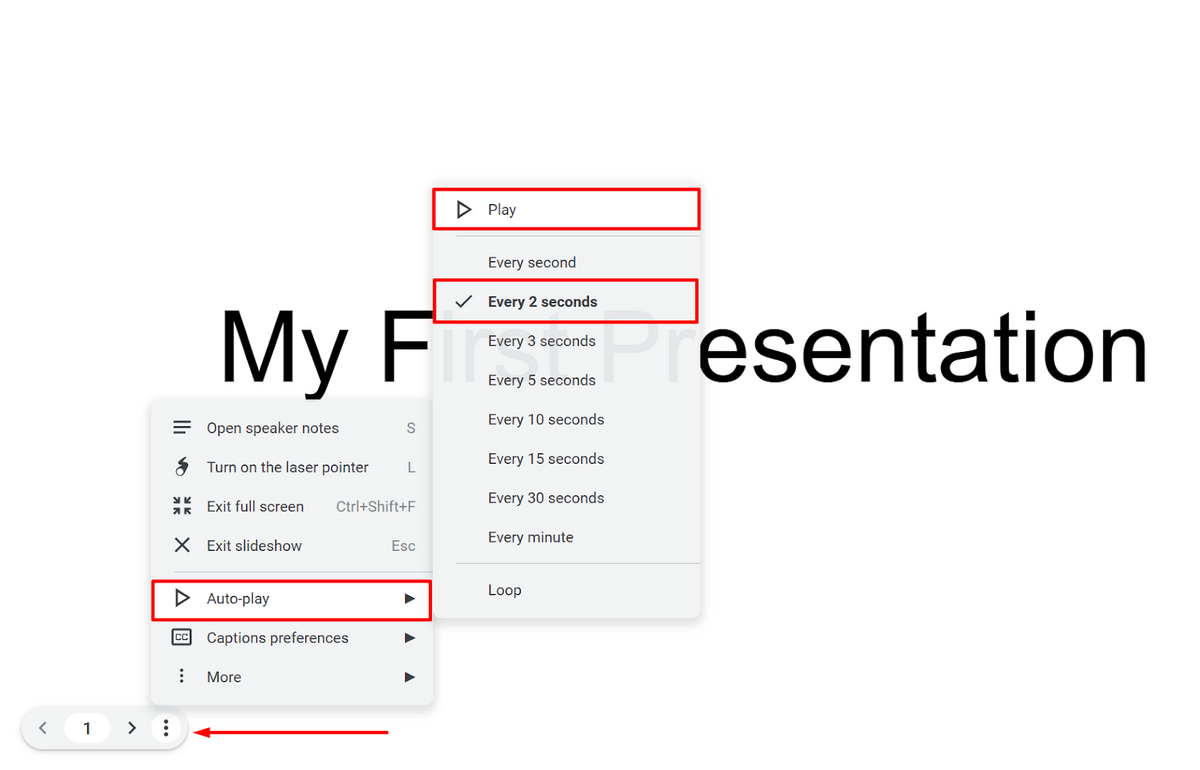
- Click on “Slideshow” at the top-right corner of your Google Slides workspace.
- Locate and click on the “three dots” icon at the bottom-left corner of your presentation.
- Select your preferred autoplay speed.
- Click “Play” to finish.
Autoplay Using Transitions
You can also use the Transition feature on Google Slides. This not only lets you make your slides change after a set interval but also lets you add some playful animations. Here’s how to play Google Slides automatically without clicking using transitions:
- Go to a specific slide.
- Locate the Transition option in the top toolbar
- Under Slide Transition, select your preferred transition type from the dropdown menu.
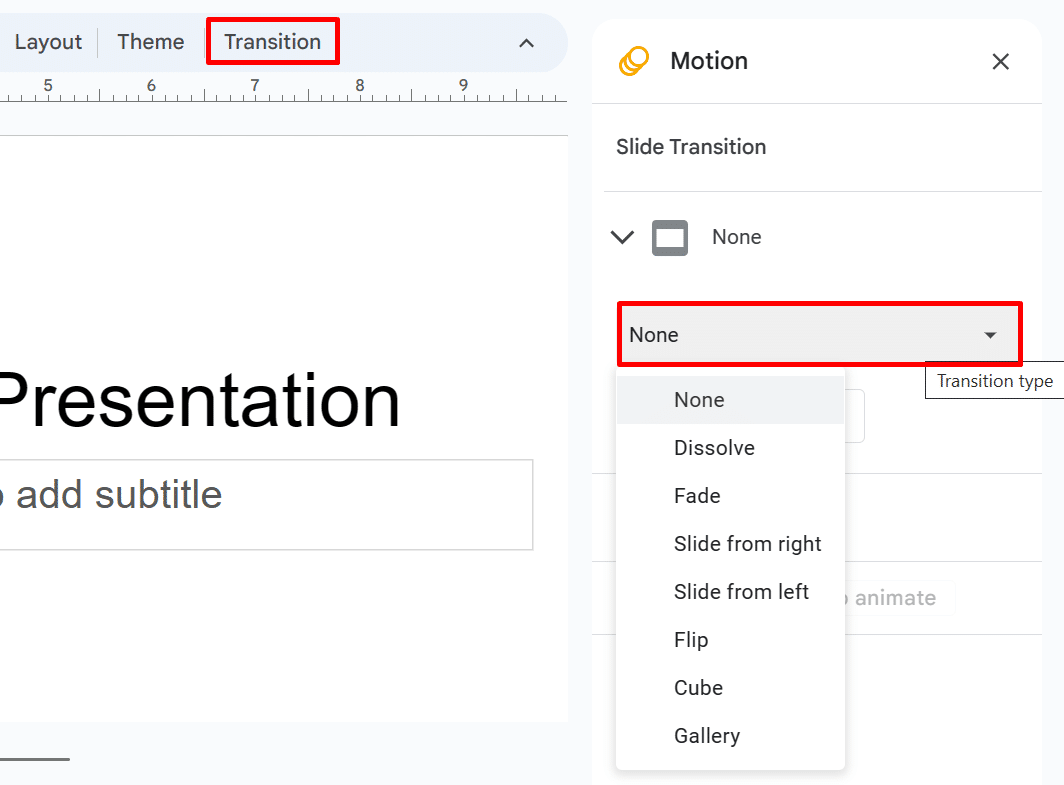
- Drag the speed controller to set your time delay from 0.1 to 5 seconds (or whatever variant you prefer).
- Click “Apply to all slides” to finish.

How to Make Google Slides Play Automatically on a Loop
Publishing your Google Slides to the web also lets you access the looping functionality of the platform. For example, you may want your slideshow to repeat continuously when it’s embedded on your website.
To make Google Slides play automatically on a loop, simply follow these steps:
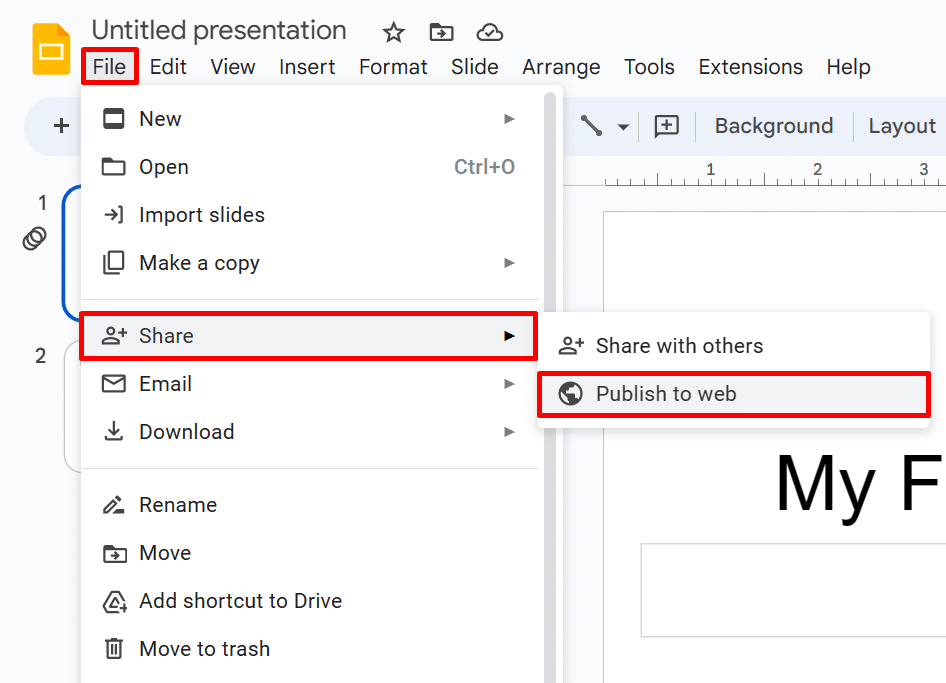
1. Click on File > Share > Publish to Web
2. In the dialog box, select whether to publish through link-sharing or an embedded link.
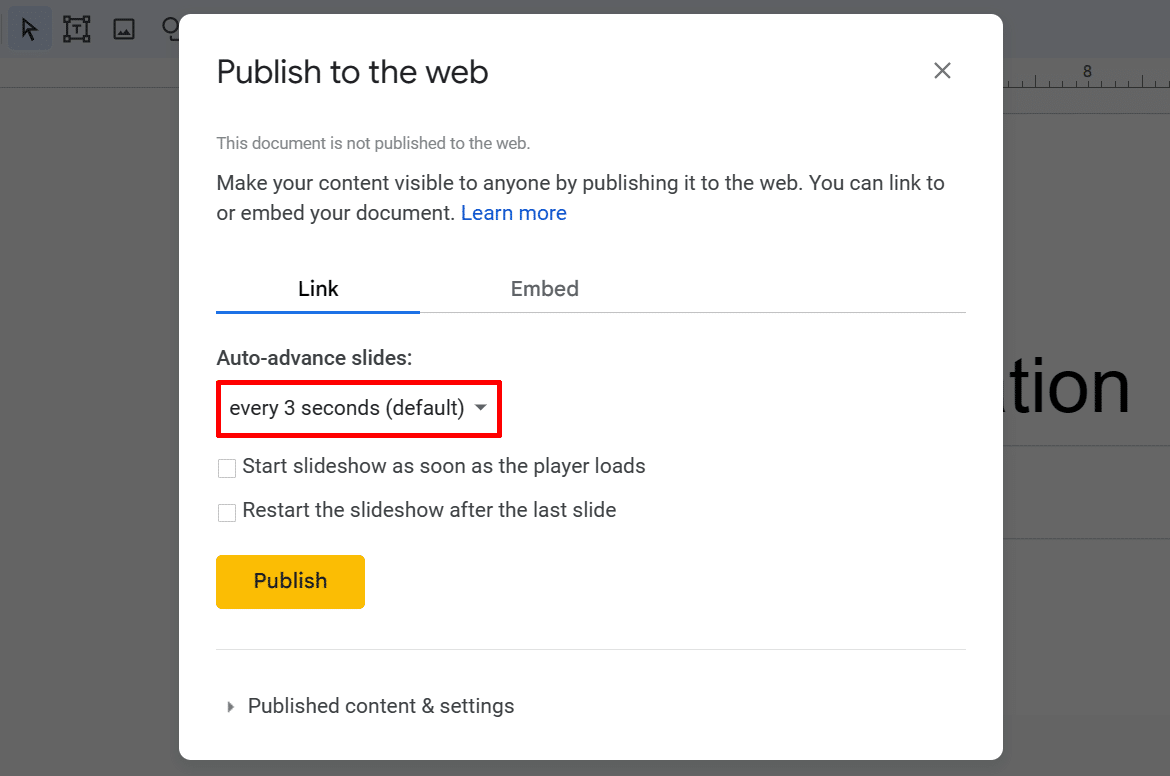
3. If you publish under Link:
- Configure the auto-play speed by choosing from the drop-down menu under Auto-advance slides.
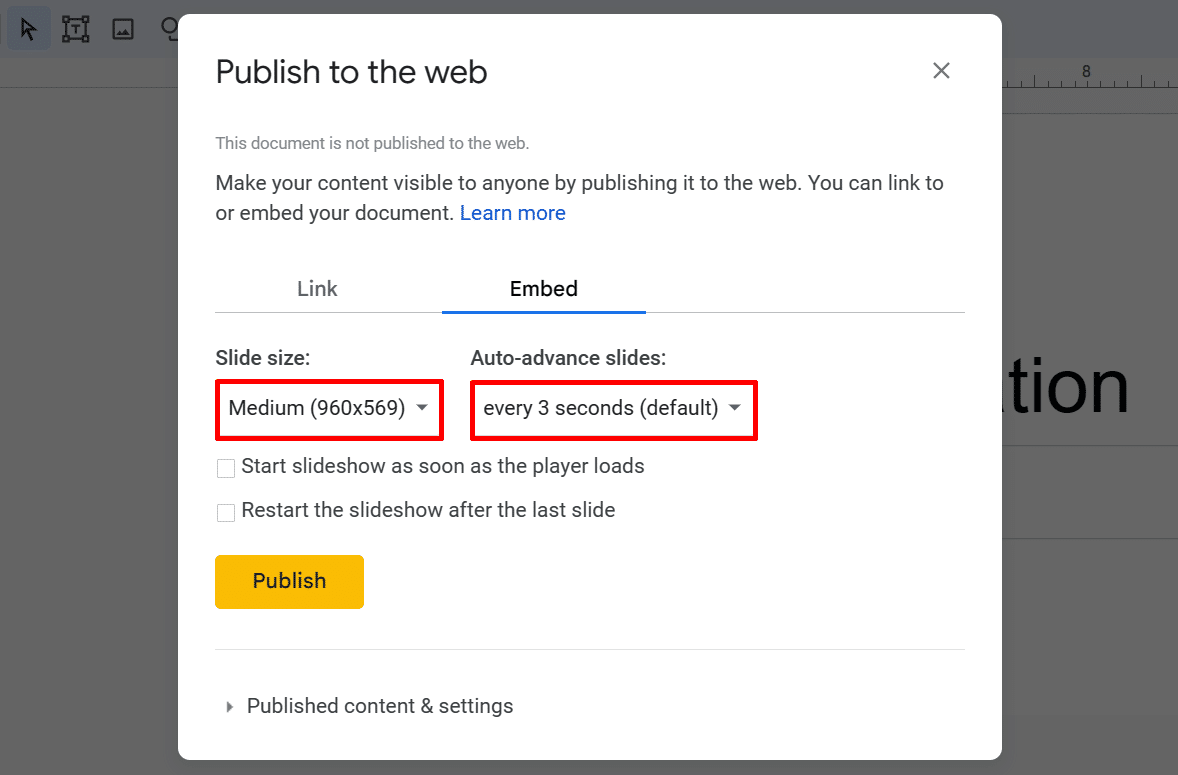
4. If you publish under Embed:
- Under Slide size, choose the size and format of your slideshow.
- Under Auto-advance slides, select how long you want each slide to appear before advancing to the next one.
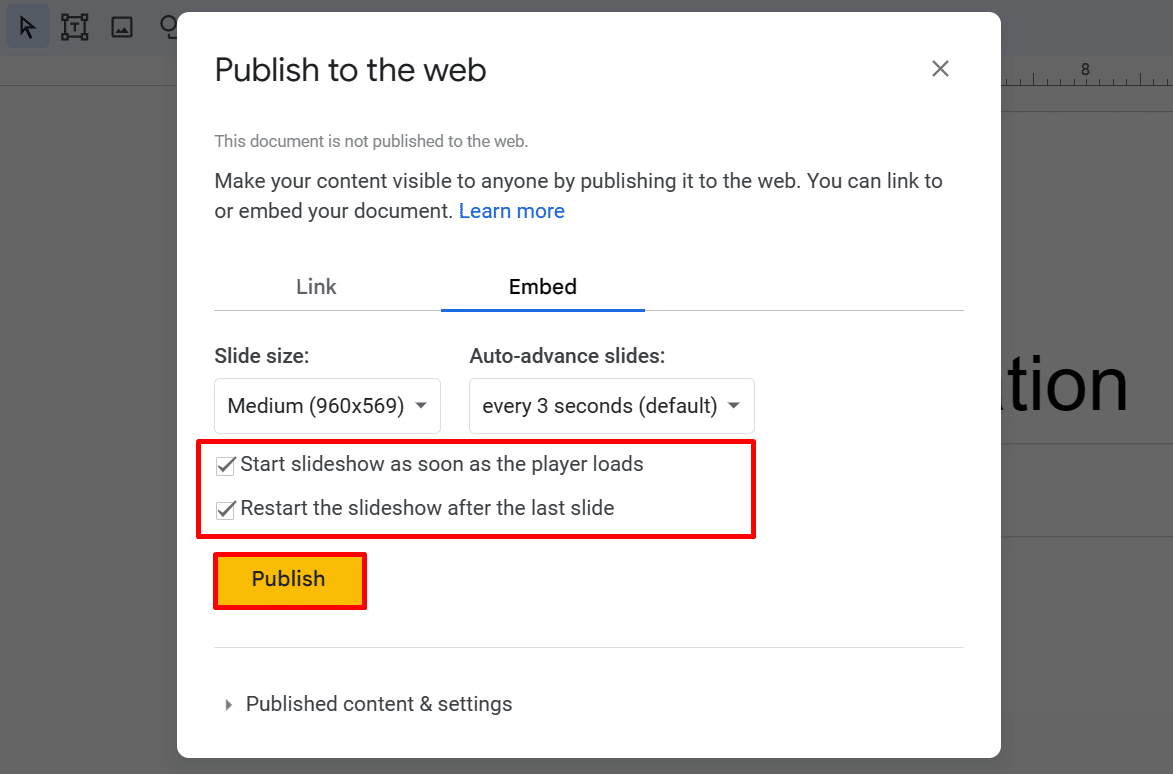
5. To enable autoplay and looping, be sure to check the boxes for “Start slideshow as soon as the player loads” and “Restart the slideshow after the last slide.”
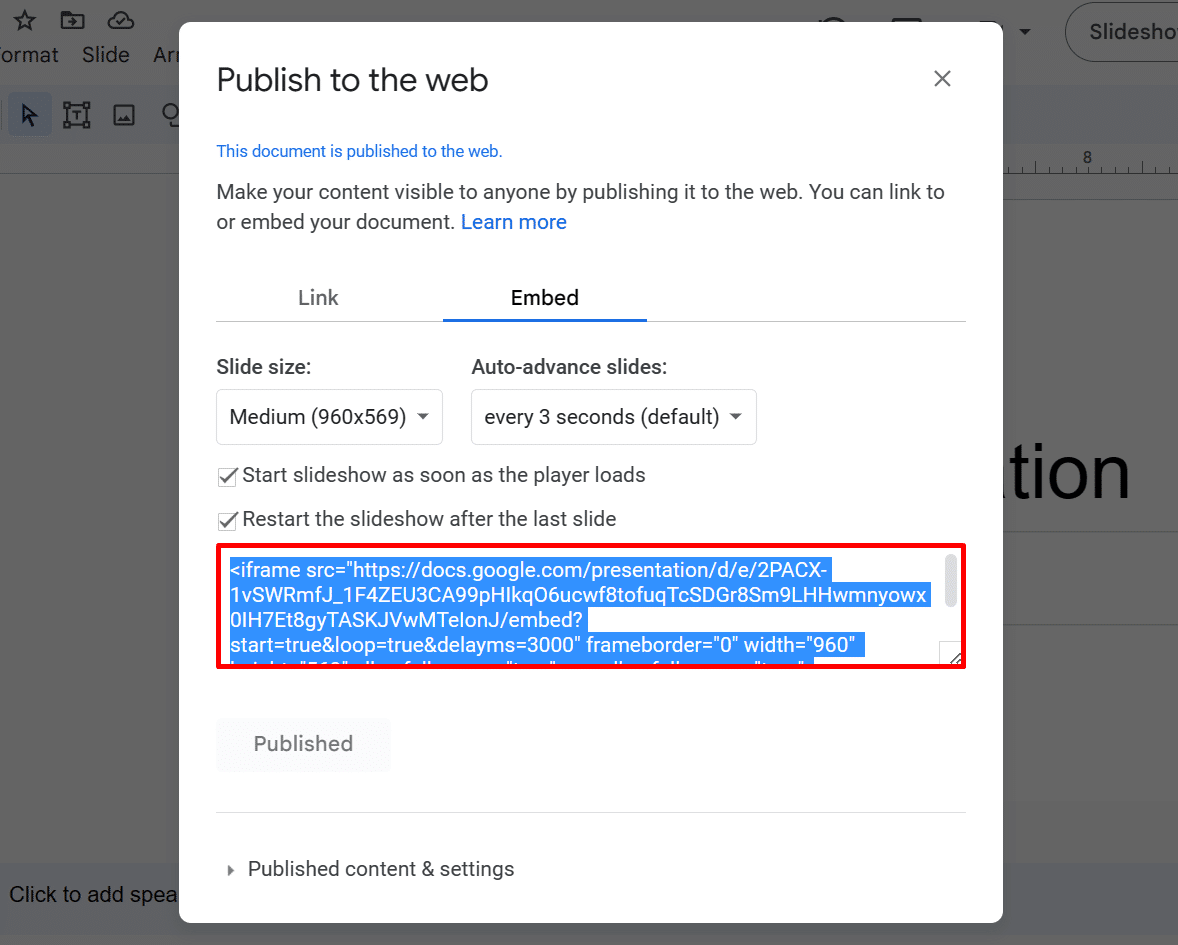
6. Click on the “Publish” button.
7. To share your presentation, either copy the publish link or copy the generated embed code.
How to Loop Google Slides Presentations Without Publishing
You don’t necessarily have to publish your slides online to loop them – especially when it concerns information that shouldn’t be shared with the public. To set it up manually, follow the steps outlined below:
- Click on the Slideshow button at the top-right corner of your screen to open your presentation in full-screen mode. Alternatively, you can press Ctrl + F5 on your keyboard to do the first step
- Click on the three dots icon at the bottom-left corner of your screen.
- Choose Auto-play and toggle on Loop.
- Select your preferred auto-advance speed and click Play.

How to Autoplay a Video in Google Slides
If you’re going to add video files to your Google Slides, you might want them to autoplay for a seamless slideshow. This removes the need to play the video with a mouse click.
To autoplay a video in Google Slides:
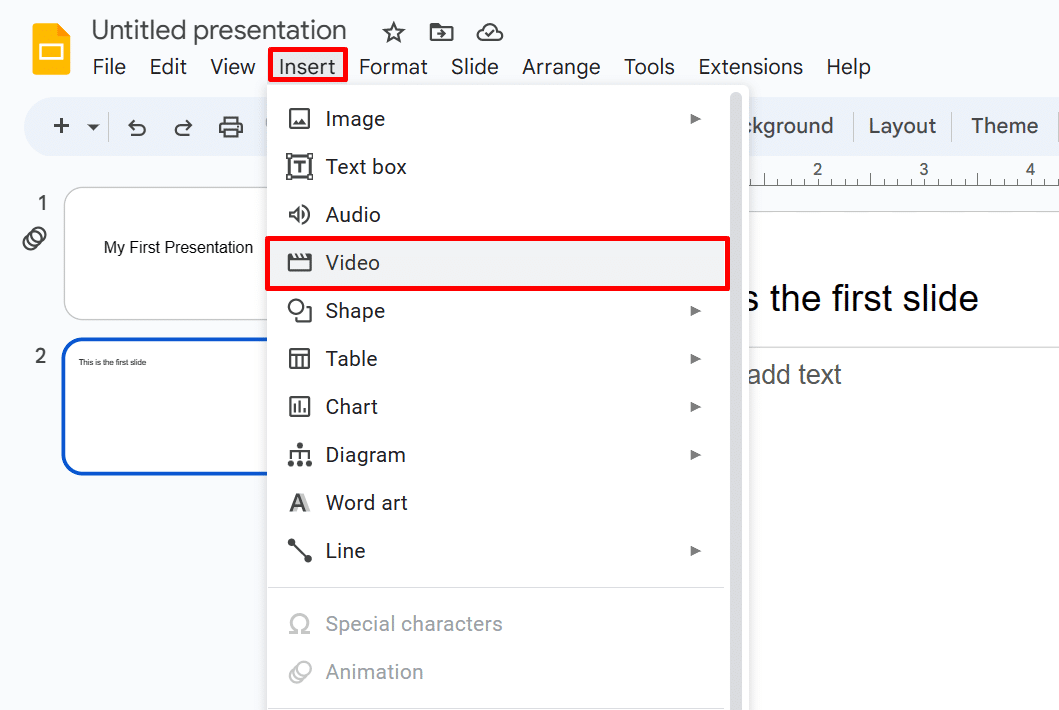
- Add a video to your presentation by going to Insert and selecting “Video.”
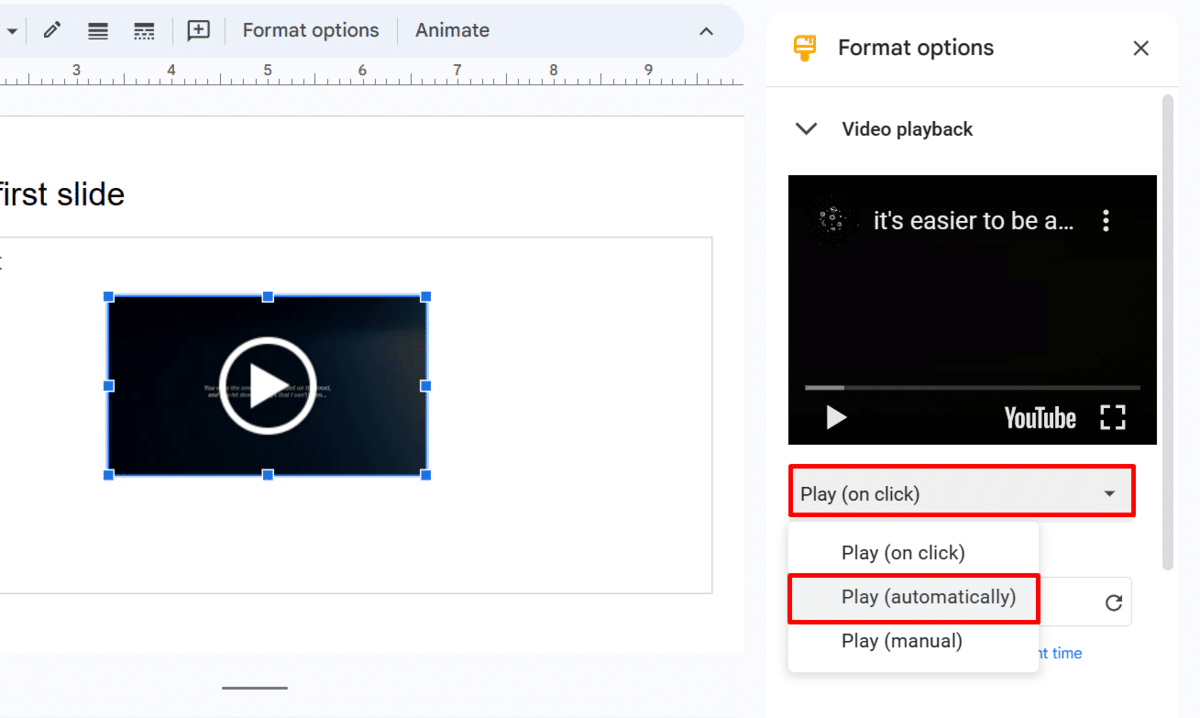
- In the Format option sidebar, select “Play (automatically)” from the dropdown menu.
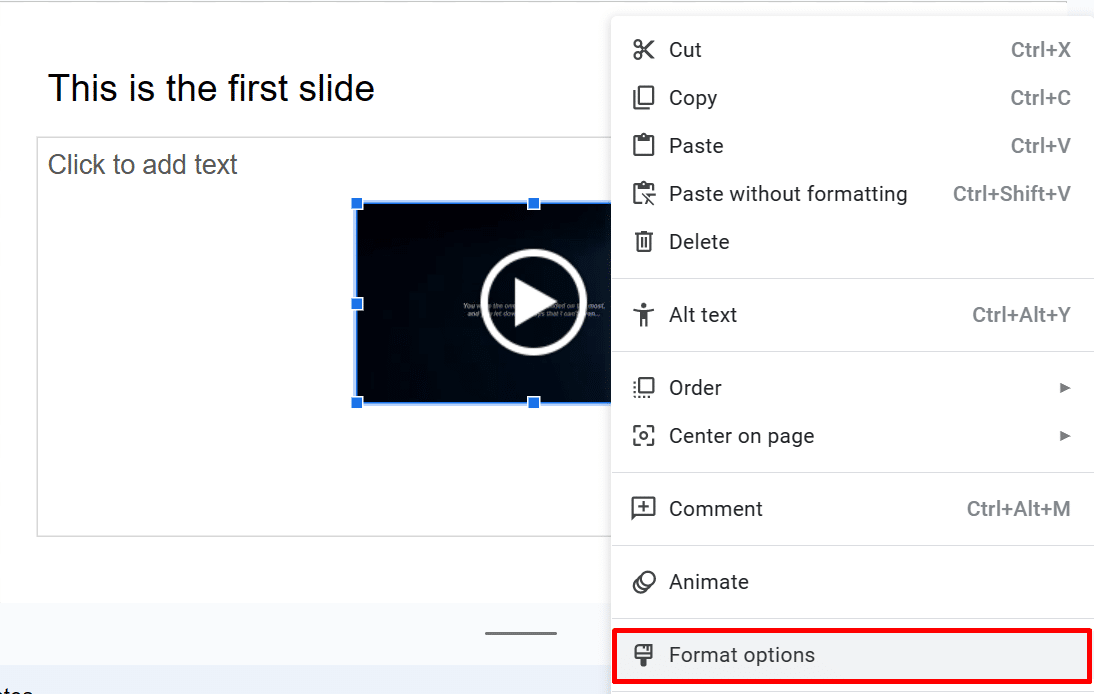
If the sidebar doesn’t appear, you can right-click on your video file and choose “Format options.” This should display the sidebar where you can proceed to the second step mentioned above.
Frequently Asked Questions
1. What Does Loop Audio Mean in Google Slides?
Loop audio is a Google Slides feature that makes a specific audio file play continuously until you go to the next slide or stop the presentation altogether. You can enable this functionality by right-clicking on the “Sound file” and choosing Format options from the context menu. To make your audio repeat without stopping, ensure that the Loop audio checkbox is ticked.
2. Why Is Autoplay Not Working on Google Slides?
Autoplay may not be working if you have an incompatible browser. Therefore, it’s essential to keep your browser current to ensure that the features of Google Slides work properly. Alternatively, you can also clear your browser’s cache and cookies. If this still doesn’t work, try using a different browser or device.
3. How Do You Make a Slideshow Change Every 10 Seconds?
To make your slides advance every ten seconds, start your presentation by clicking “Slideshow” at the top of your screen. Hover your mouse over the bottom-left corner of your slide and click on the “three dots” icon. Select “Autoplay” and choose “Every 10 seconds” (or whichever time interval you prefer). Click on “Play.”
Final Thoughts
Learning how to make Google Slides play automatically is incredibly handy, especially for event displays or when it needs to be played for long durations. Simply follow any of the methods we’ve discussed in this article to access the autoplay feature in Slides!
Interested in mastering the various features of Google Slides and other Google Suite products? Don’t miss out on these Udemy GSuite courses today!
Related:
- 3 Easy Ways to Automatically Insert Timestamps in Google Sheets
- How to Change Slide Size in Google Slides [Easy Guide]
- How to Add a Video to Google Slides [Complete Guide]
- How to Hide a Slide in Google Slides (in 2 Seconds)
- How to Add Audio to Google Slides (Simple Guide)
- How to Make Google Slides Vertical in Under 2 Minutes
- How to Fix Google Slides Words Overlapping Issue