When you’re working on an image in Google Docs, you may need to flip it horizontally or vertically to make it look more visually appealing (or to fit it better into your design).
Can you flip an image in Google Docs? Yes, you can! While there’s no direct one-button “flip an image” switch available, there’s a simple workaround.
To flip an image in Google Docs, upload your image in the Drawing tool, right-click on it, and select either “Flip horizontally” or “Flip vertically” to flip the image as desired.
Not only does this article teach you different ways on how to flip an image in Google Docs, but it also covers rotating and mirroring them.
Table of Contents
How to Flip an Image in Google Docs
There are two ways to flip an image in Google Docs: horizontally or vertically. You can either flip the image horizontally (i.e., mirrored image) or vertically (i.e. inverted image).
There are two ways to do so:
- Right-clicking the image
- Using the Actions Menu
Method 1: Flipping a Picture on Google Docs Using Right-Click
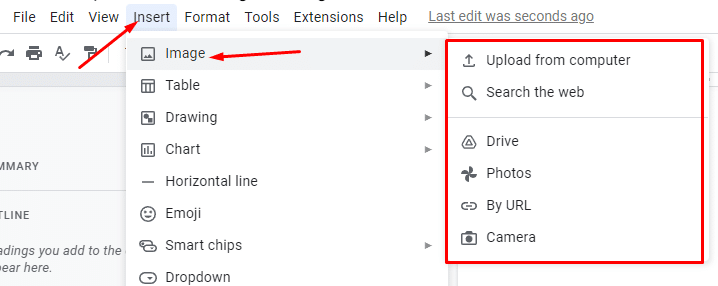
- Insert the image into your Google Docs document by clicking the “Insert” menu > “Image.” Then copy-paste the uploaded image into the Drawing tool.
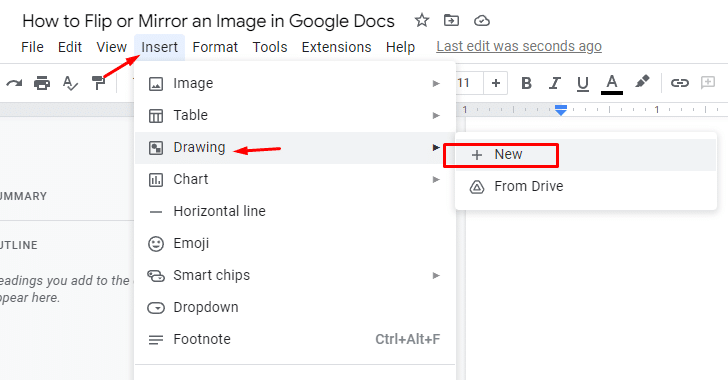
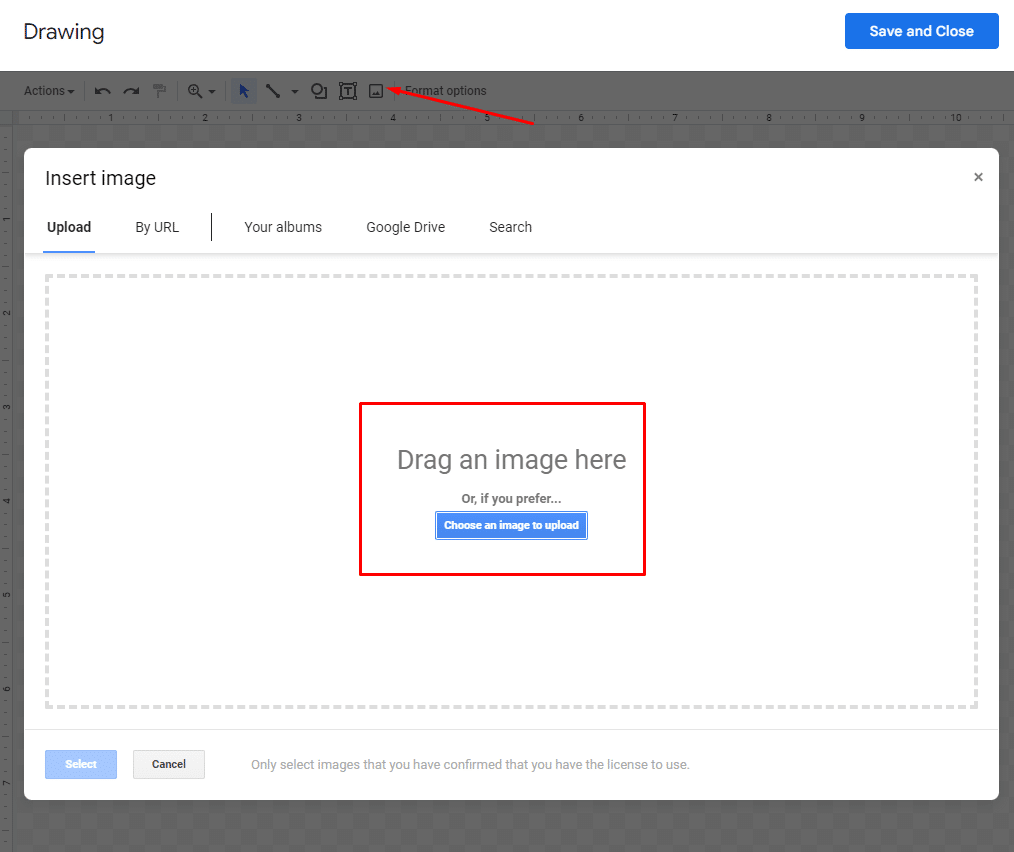
- Alternatively, you can upload the image directly to the Drawing tool by clicking the “Insert” menu > “Drawing” > “New.”
- Then, click the “Image” icon to upload your image.
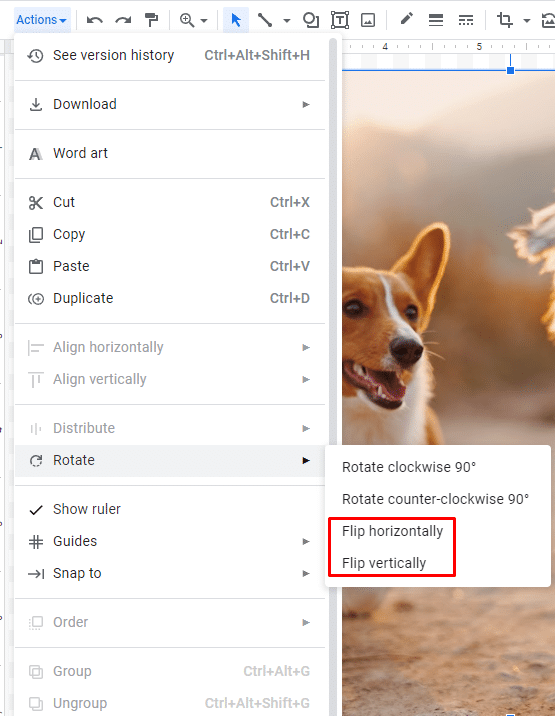
- Right-click on the image and hover over “Rotate” on the context menu.
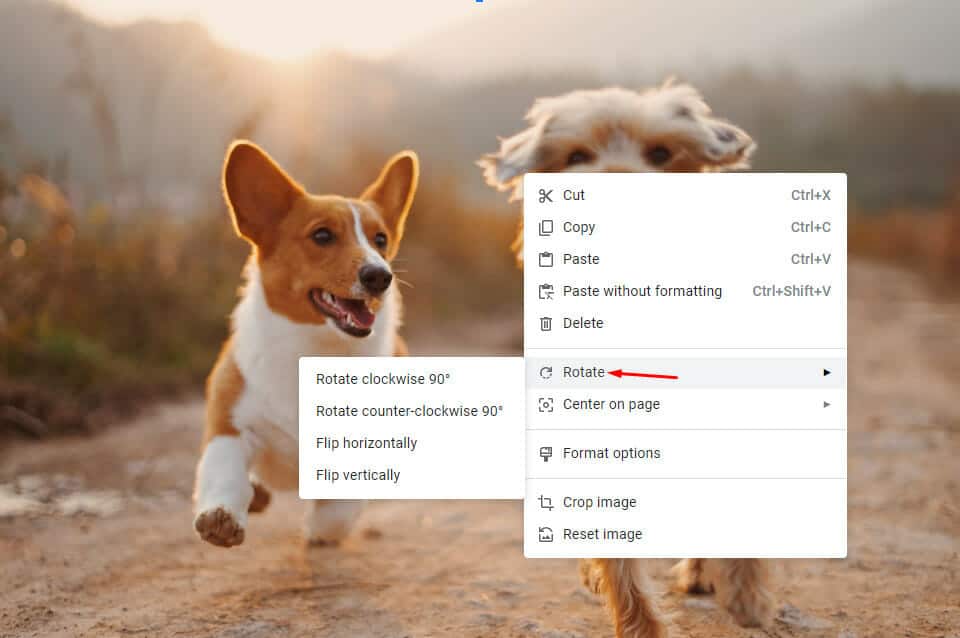
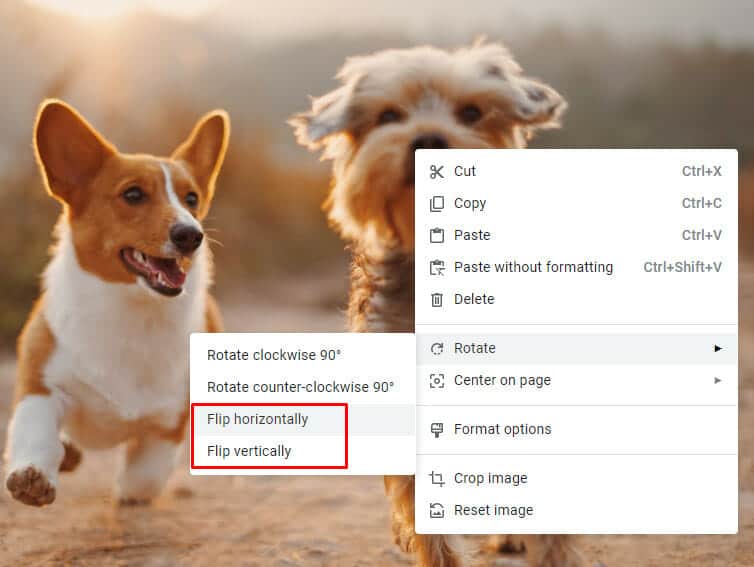
- Select either “Flip horizontally” or “Flip vertically” to flip the image as desired.
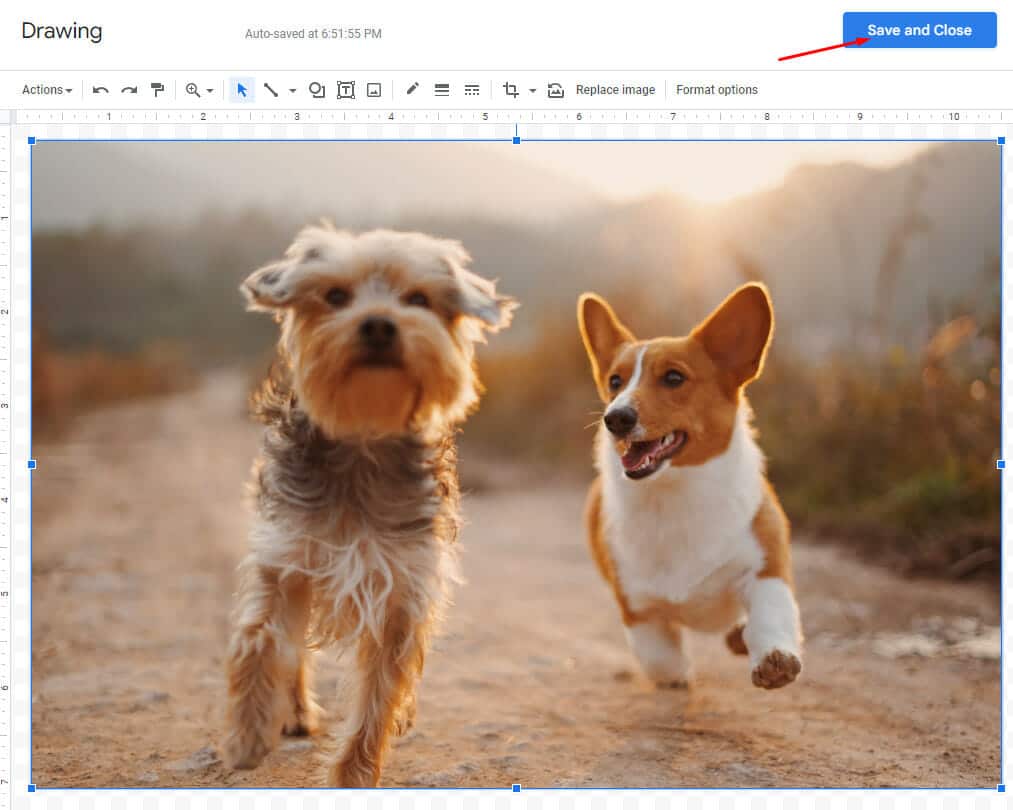
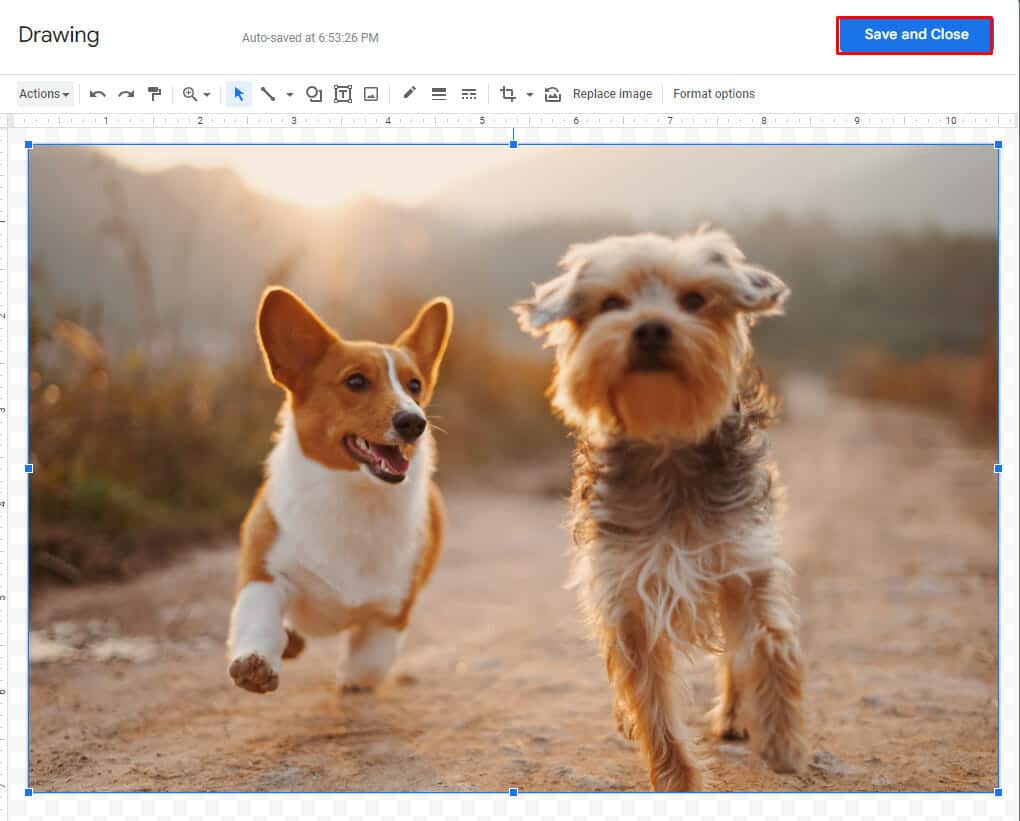
- Once done, click the “Save and Close” button at the top-right corner to apply the changes. This will return you to your Google Docs document with the flipped image.
Method 2: Flipping Images on Google Docs Using the Actions Menu
Another method to flip images in Google Docs is via the Actions menu (located in the Drawing tool). Here’s what you can do:
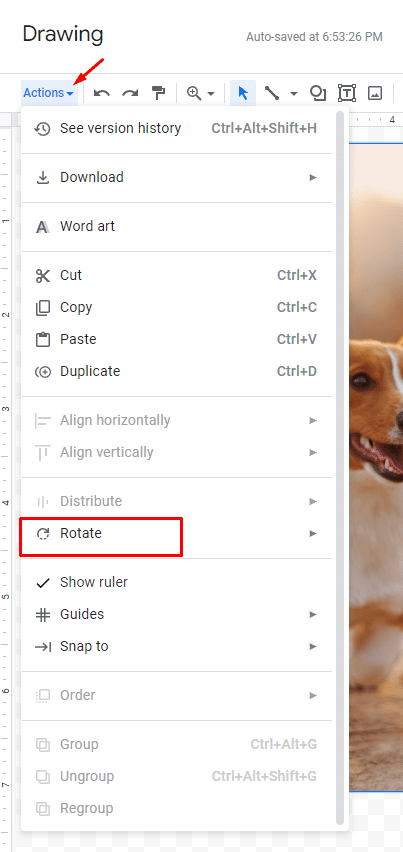
- Click on “Actions,” located on the top-left side of the Drawing tool.
- Select “Rotate” in the drop-down menu.
- Select “Flip horizontally” or “Flip vertically” to shift the image as desired — and that’s it!
- Once done, click the “Save and Close” button.
How to Rotate an Image on Google Docs
There are two easy methods to rotate an image in Google Docs. The first is by accessing the “Size and Rotation” menu under “Image Options.” The second is by using the blue circle (on top of your photo) to rotate it.
Method 1: Using Image Options to Rotate an Image
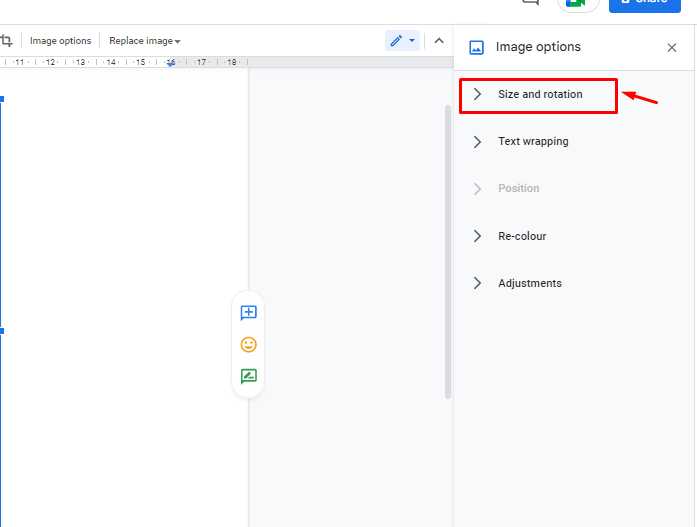
- Select the “Image Options” button in the toolbar above the image.
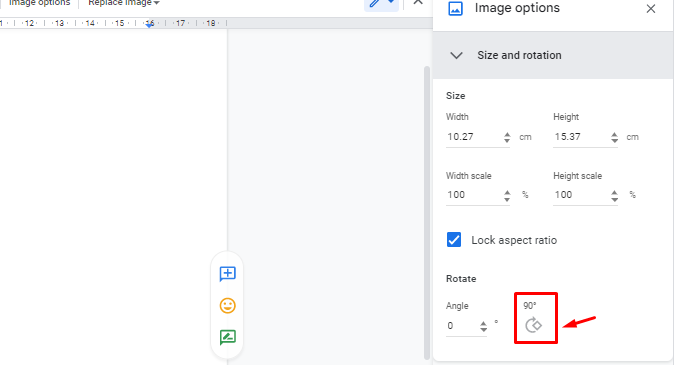
- In the sidebar menu, click on “Size and Rotation.”
- Under “Size and Rotation,” click on the icon that looks like a circular arrow to rotate your image by 90 degrees. To rotate it a bit more, keep clicking until you get your desired result. If you’re not happy with these changes, undo the previous action by pressing “CTRL + Z.”
- For a faster way to rotate an image, you can input “180” under “Angle,” and the image will instantly rotate.

Note: You can also right-click on the image and select “Image Options” from the context menu to access “Size and Rotation.”
Method 2: Using a Blue Circle to Rotate an Image
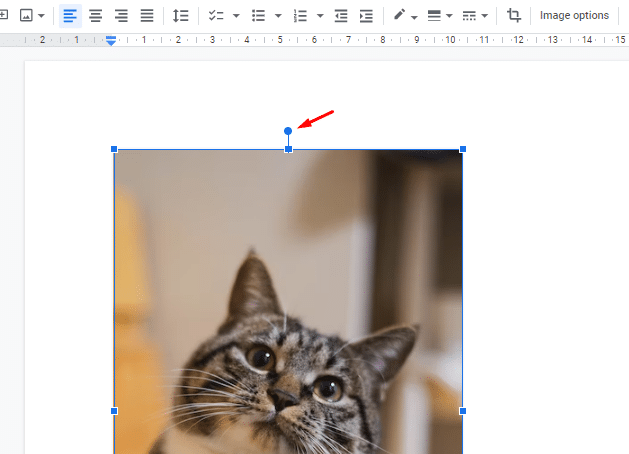
Another way is to manually rotate the image using the blue circle, which appears over your image’s top center square:
- Click on the image then left-click and select the blue circle (where the arrow is pointing). As you hover over it, your cursor will switch to a cross, indicating that the image can be rotated.
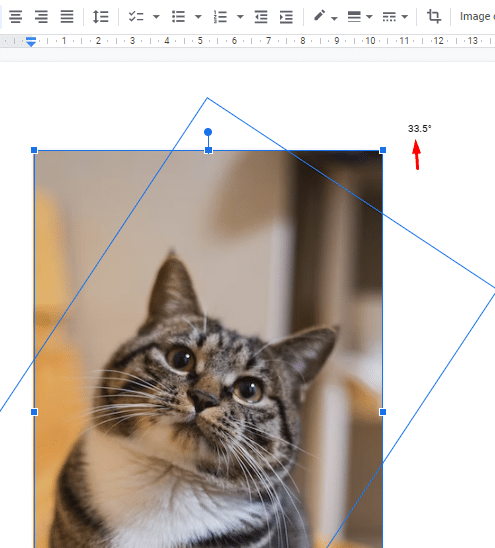
- Click and drag your cursor to rotate the image to your desired orientation. Once done, release the mouse button.
Why You Might Need to Reverse/Invert an Image
You may need to reverse or invert an image for a variety of purposes. Here are some of them:
- To correct image orientation: If your image is captured in the wrong orientation, fix it by simply inverting/reversing the image.
- To mirror an image: If you want to create a mirror image, inverting or reversing the original image can help achieve this effect..
- To create negative images: Inverting an image can create a negative effect (which is sometimes used for artistic or creative purposes).
- To improve readability: Sometimes, inverting an image can make it easier to read text or view other details that may be difficult to see in the original orientation.
- To fix errors: An image may contain errors or artifacts that might be corrected by inverting or reversing the image.
Conclusion
That’s just about everything you need to know about how to flip an image in Google Docs! By following these tips – and exploring the tools available in Google Docs – basic photo adjustments are a breeze.
Looking to improve your efficiency? From Docs to Sheets, Udemy’s GSuite courses are designed to increase your professional productivity.
Related:
- Google Sheets Reverse Order: Flip Data in Google Sheets
- Easily Insert a Google Sheet Into Google Docs
- How to Highlight in Google Docs [Step-by-Step Guide]
- How to Print Envelopes in Google Docs [3 Easy Ways]
- How to Insert Emoji in Google Docs [4 Easy Ways]
- How To Make a Venn Diagram in Google Docs (+ Free Templates)
- How To Overlap Images in Google Docs (2 Easy Ways)