Whether you’re working on a professional report, a school requirement, or a personal document, adding captions to your images on Google Docs can make your content easier to understand and more organized.
But knowing how to put a caption on a picture in Google Docs can be a bit of a challenge, as the platform doesn’t come with a built-in caption feature yet. Luckily, there are a few quick and easy ways to create text captions for your photos.
In this article, we will walk you through the steps on how to add a caption to an image in Google Docs, including using the drawing tool, a table, in-line text, or a Google Docs mobile app.
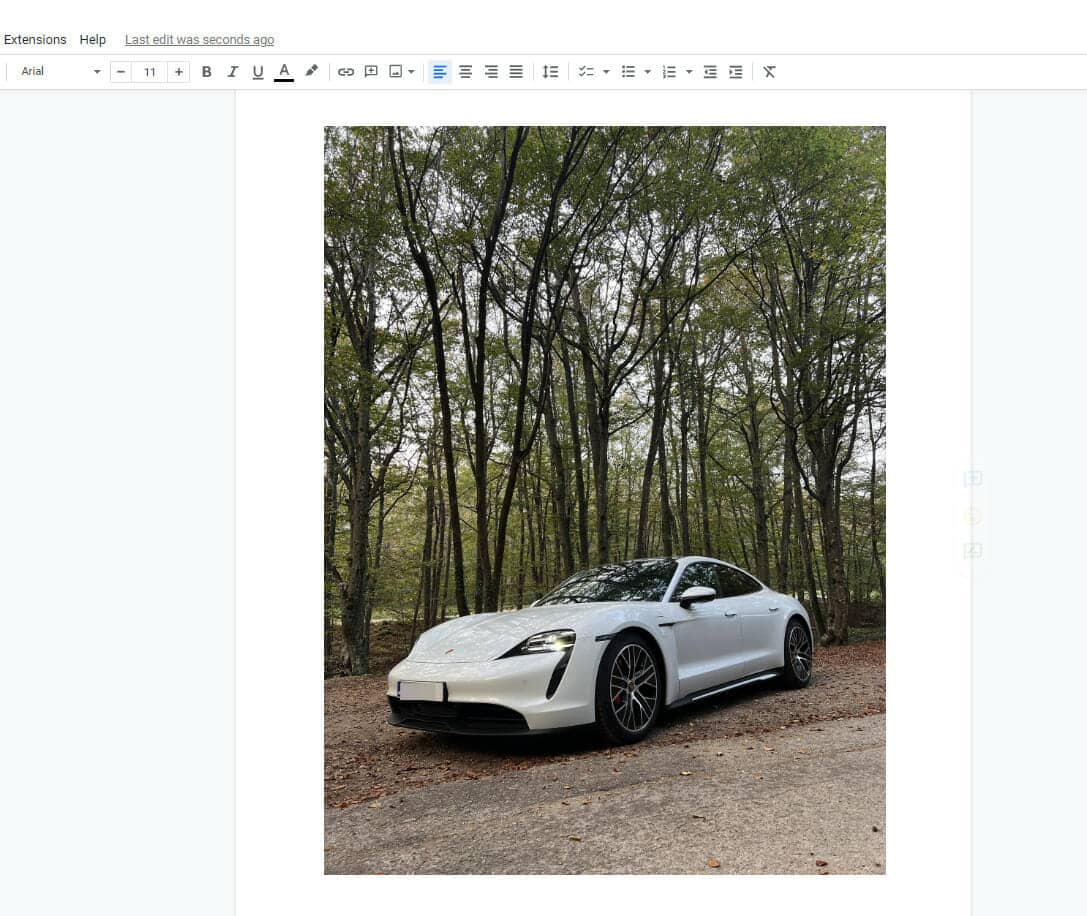
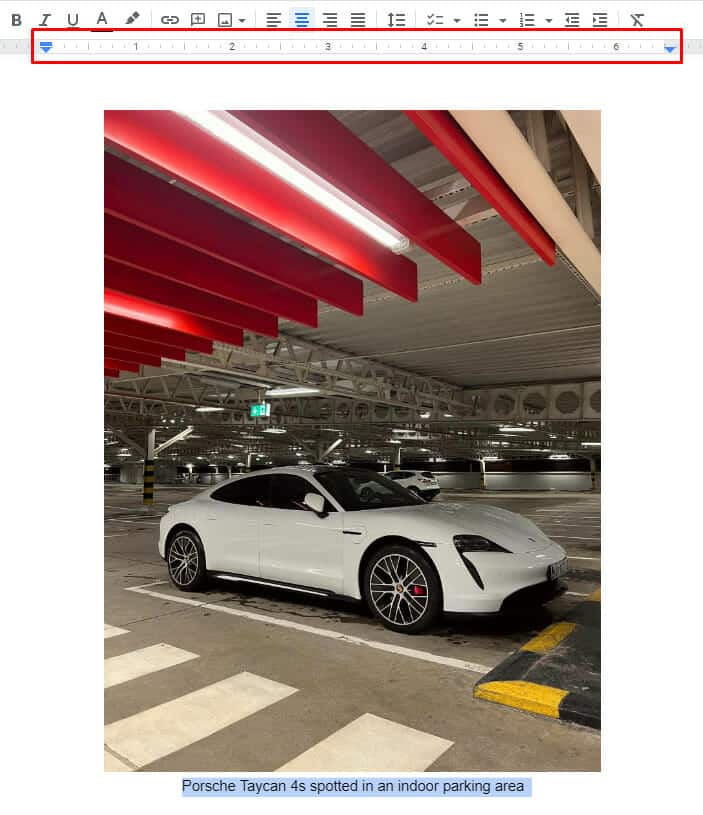
The simplest way to add a caption to an image in Google Docs is to insert your image into your document, select your image and choose the “In-line text” icon. Then, point your cursor below your image and proceed to type your caption.
Table of Contents
How to Add Images in Google Docs
Properly adding an image to your document is essential before knowing how to label an image in Google Docs. Here’s how to do it:
- First, launch Google Docs and open the document you want to add a caption to.
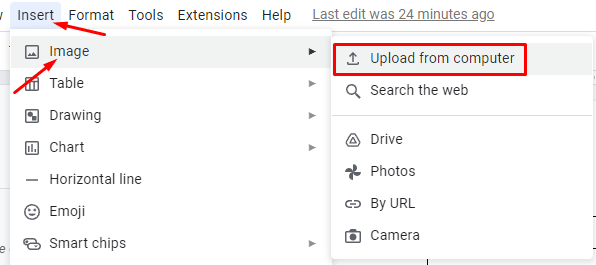
- Click on the “Insert” menu. Select “Image,” then choose from the following upload options:
- Upload from your computer
- Search the web
- Upload from Google Drive
- Upload from Google Photos
- Upload from a URL
- Upload from camera
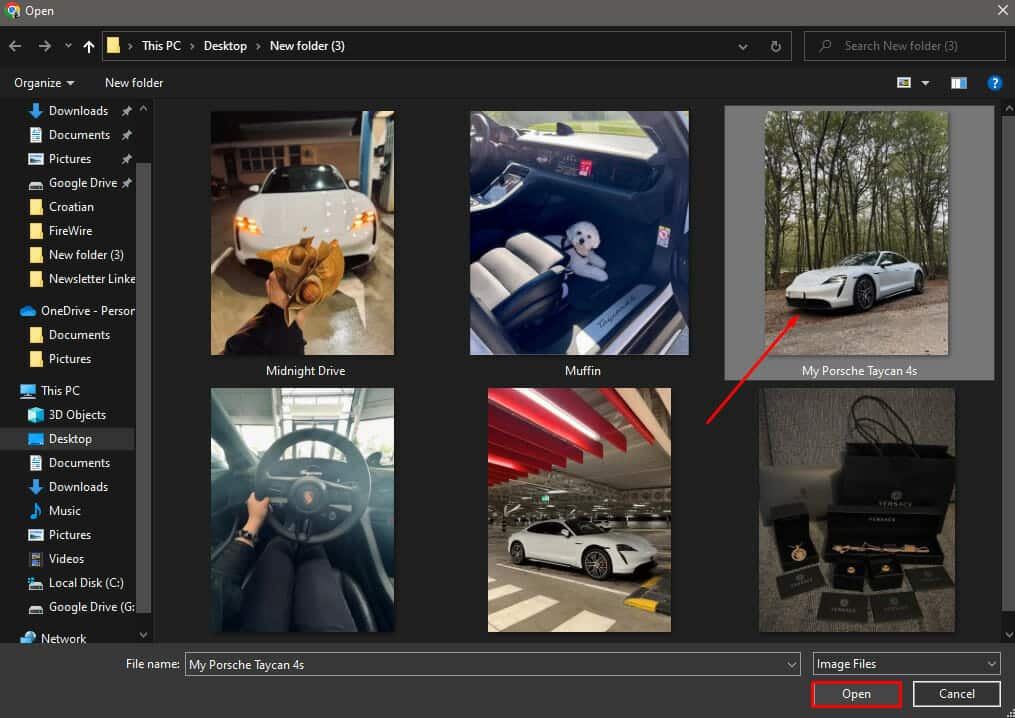
- Finally, select the image you want to upload and click “Open” to add the image to your document.
And that’s it! You’ve successfully added an image to your Google Document!
How to Add a Caption to an Image in Google Docs
Adding a caption to an image on your Google Document can help you provide context, make your document more accessible and readable, add to your document’s appeal, or give credit to the image source.
Here are three different methods you can use to add Google Docs image caption in its web version:
Adding a Caption with the Drawing Tool
To add a caption to a photo in Google Docs using the Drawing tool, simply follow the steps below:
- First, open a new or existing document in Google Docs.
- On the main menu, click the “Insert” tab.
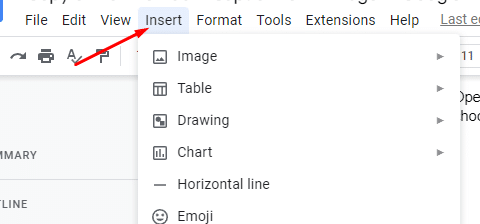
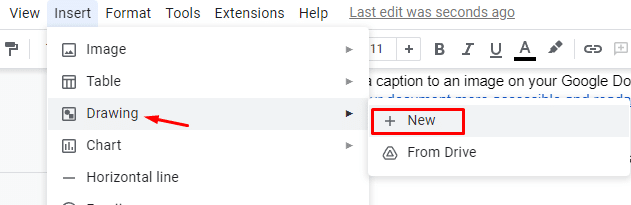
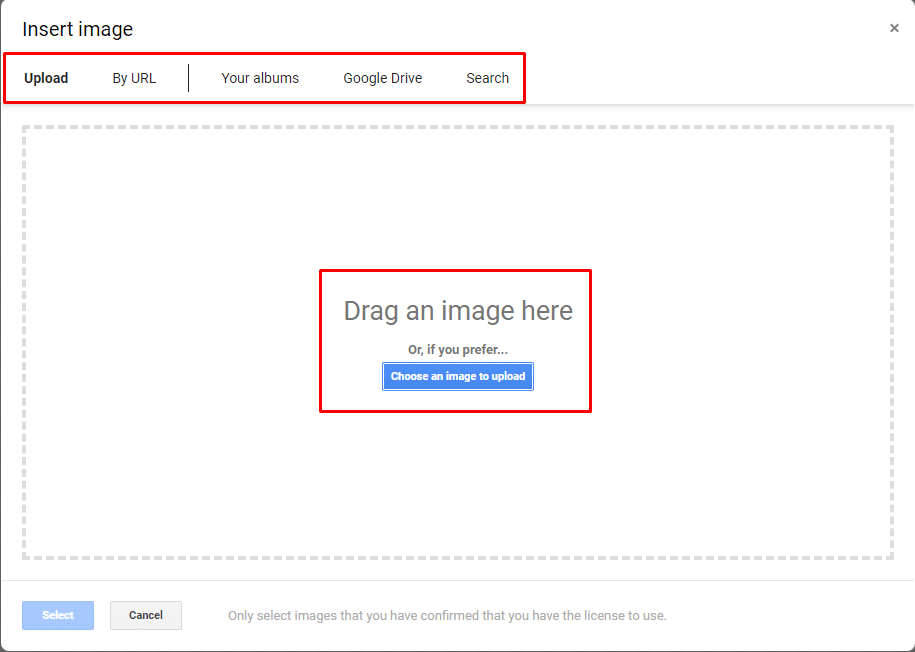
- Then, select “Drawing” > “New.” This will open a pop-up window. You can also select the “From Drive” option if you want to upload an existing drawing from Google Drive.
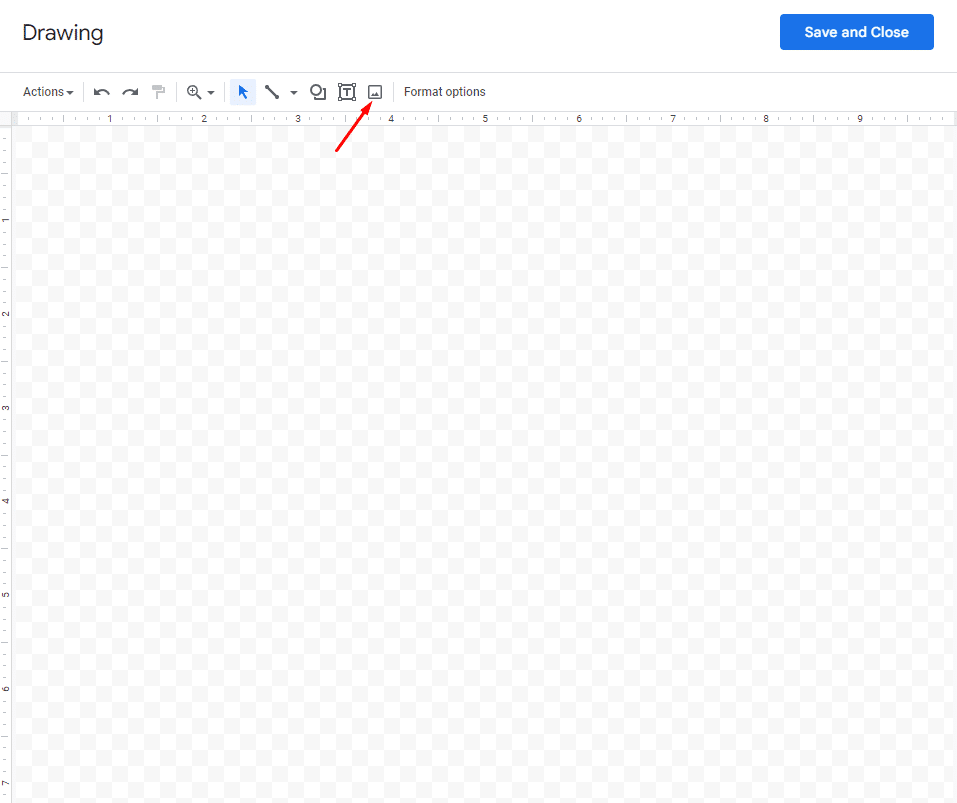
- Insert your image in the “Drawing” tool by clicking the “Image” tool. Once uploaded, your image will appear in the Drawing tool window. You can then crop, resize, or move your image.
- You can drag and drop an image from your desktop into the pop-up window.
- You can also choose to upload from your existing files, import by URL, select from Google Photos or Google Drives, or by making a Google search.
- Then, select the “Text Box” tool and click on the space of the Drawing pop-up window where you want to place your text box.
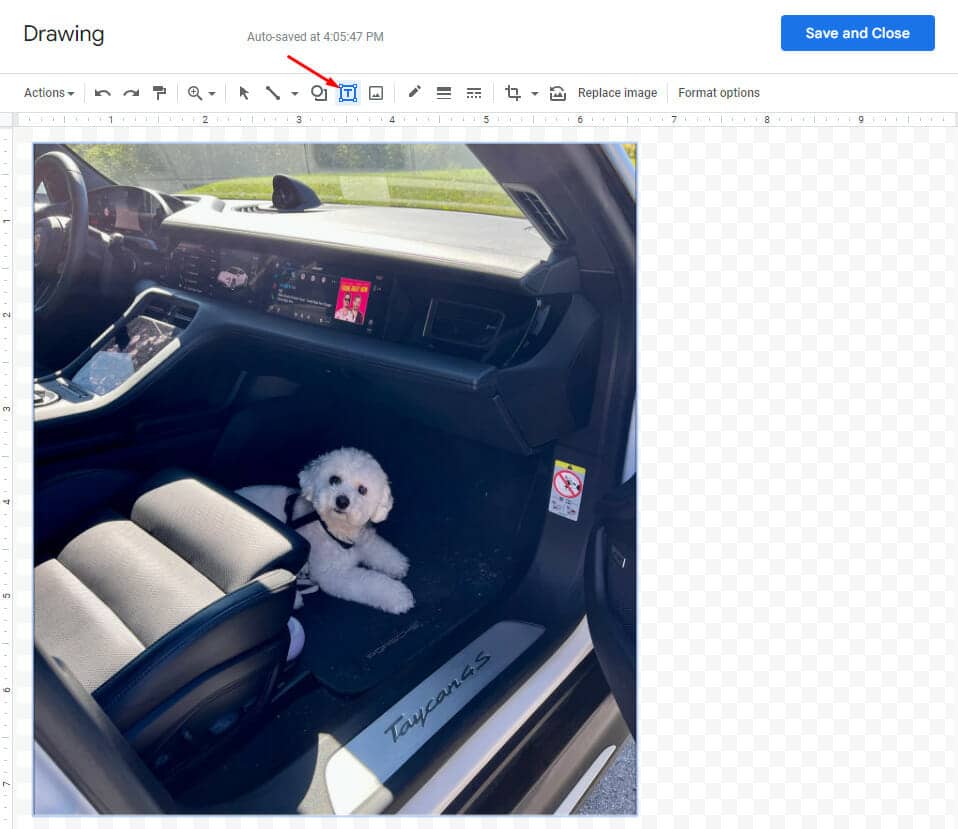
- Next, enter your caption text.

- You can also edit your font style by selecting the text you want to change and clicking the toolbar on the pop-up window where you can change its text alignment, font family, font colors, and font style, among others.
- You can also click the triple vertical dot menu to check other options for editing.
- Once you’re done with all your changes, click the “Save and Close” button.
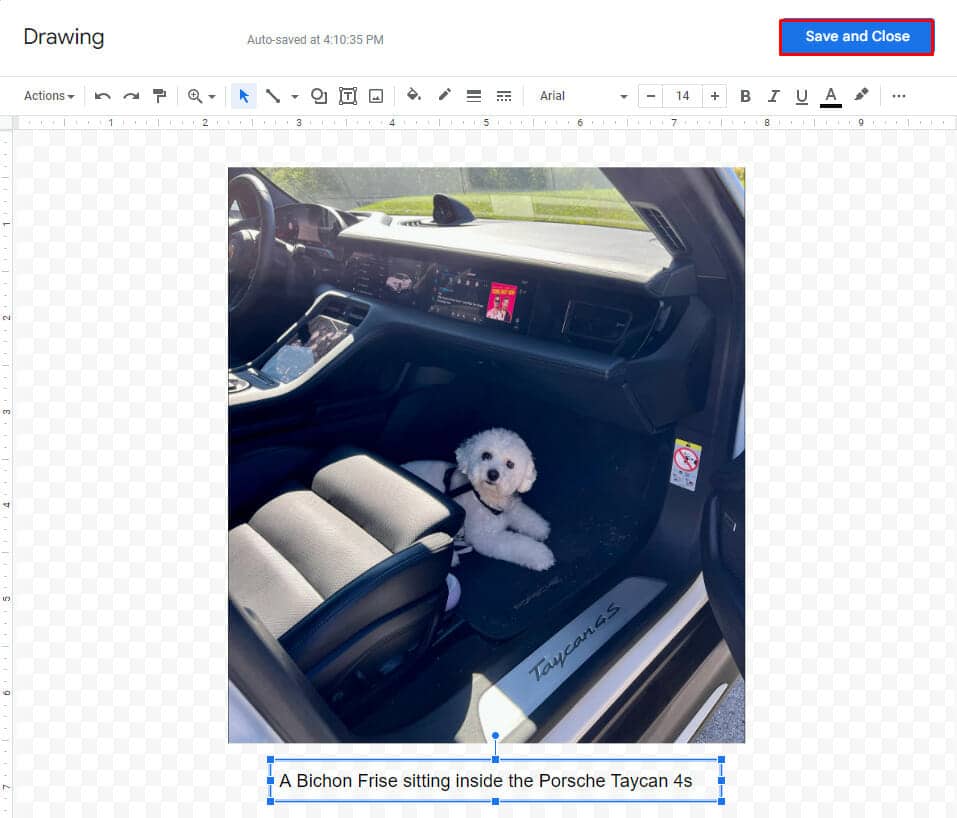
And that’s it! Your image and the caption are now linked as a single image element. You can also change the size and rotation, as well as the text wrapping of your image.

Adding a Caption by Using In-line Text
Using in-line text involves adding plain text that aligns with your image. However, the main disadvantage of this method is that your caption will not be linked to your image, so whenever you move your image, you have to ensure that your caption is not affected.
To add a caption to an image in Google Docs using in-line text, here’s what you should do:
- First, open a new or existing document in Google Docs.
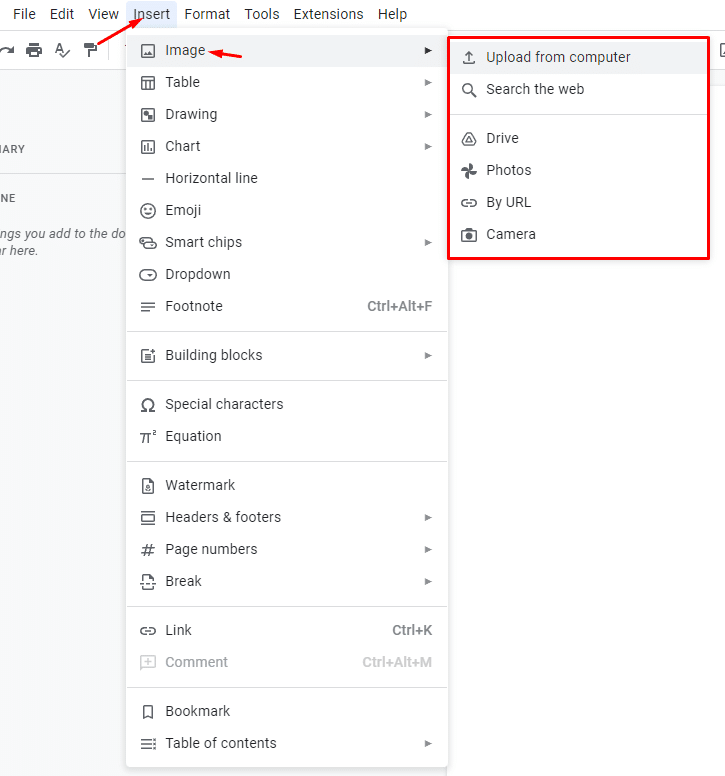
- Insert your image by clicking on “Insert” from the menu and selecting “Image,” then “Upload from computer.”
Note: You can either upload your image or just drag and drop your image from your desktop into Google Docs.
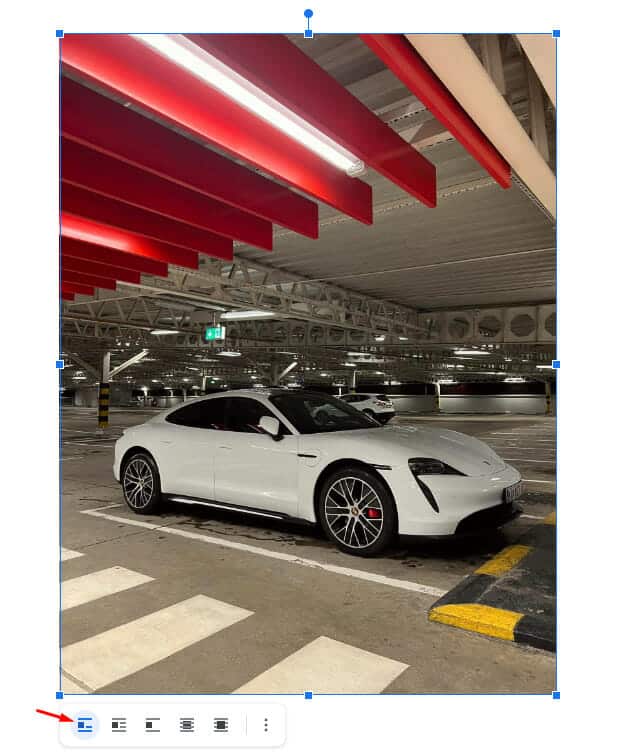
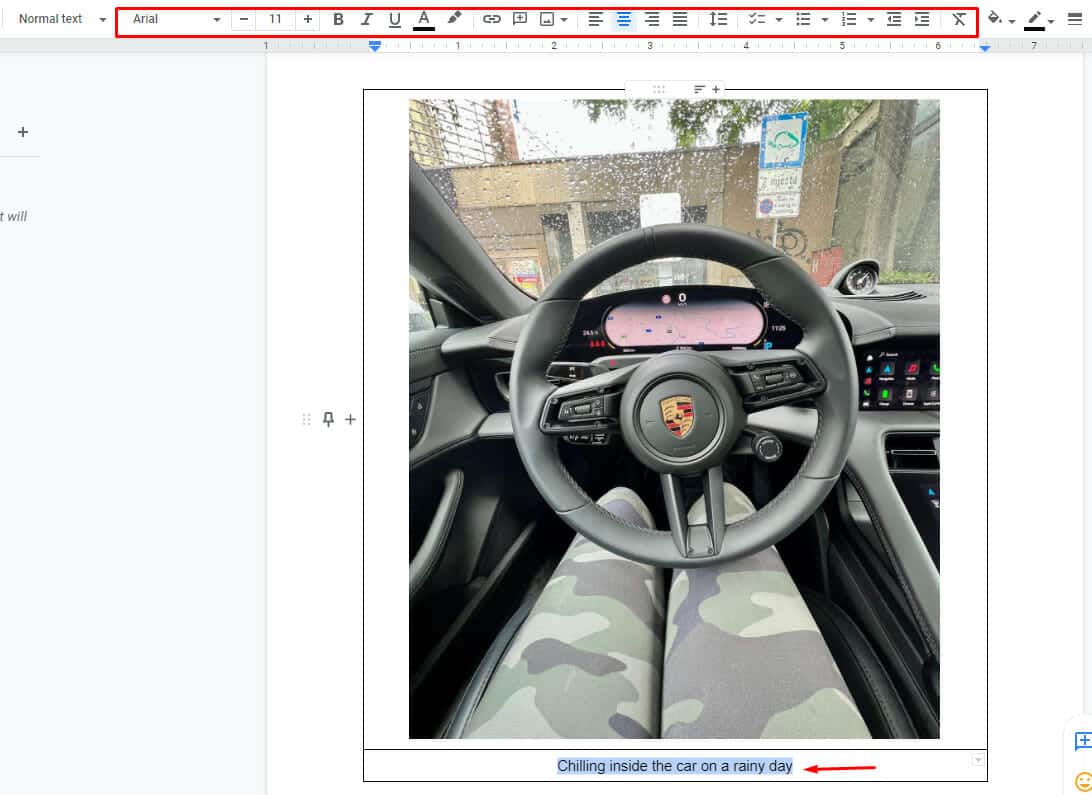
- Next, click the image you inserted. A toolbar should appear on the bottom part of the image. Select the “In-line” icon among the text wrapping options available.
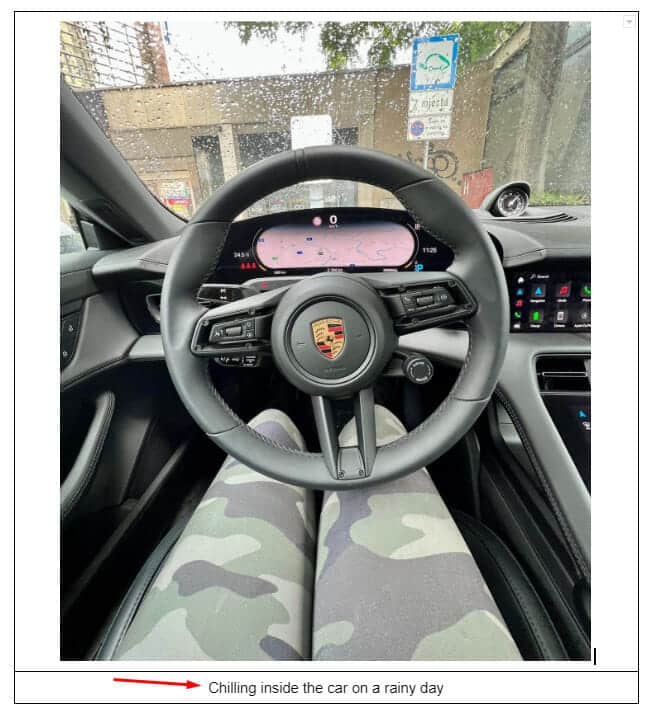
- After that, enter your caption at the bottom of your image.
Note: For longer captions, the text will follow your document’s margins by default. To change this, select your caption text and adjust the blue arrows on the top ruler.
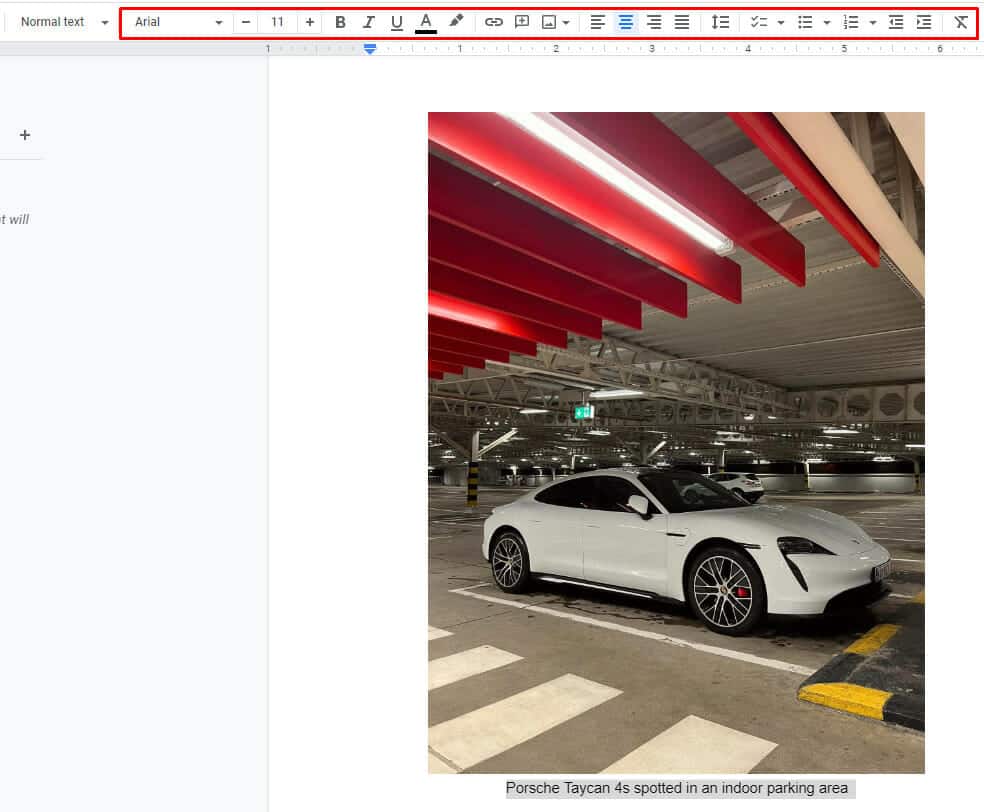
- You can also change the font style, alignment, and size of your caption by selecting the text and using the tools on the main toolbar.
Adding a Caption with a Table
Adding a Google Docs image caption with a table is useful since it’s easy to modify, customize, and design.
To create a caption using a table in Google Docs, simply follow the steps below:
- Open a new or existing document in Google Docs.
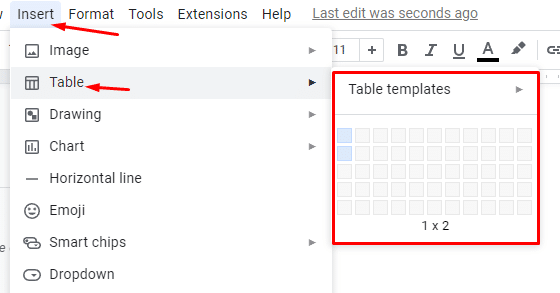
- Position your cursor on the part of your document where you want to place your table.
- Next, select the “Insert” menu, click “Table” and choose the “1 x 2” format table.
- Insert your image on the first row of the table you just created. Click the “Insert” tab, then choose “Image” > “Upload from computer” to upload an image into the table.
- Make sure your cursor is inside the first row of your table. This way, your image will be inserted in the cell of the table.
- On the second row of the table, enter your caption.
- You can also change your text styles by highlighting the text and choosing among the options on the main menu.
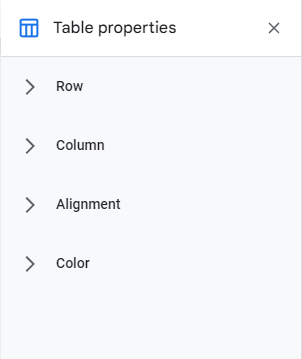
- Edit the design of your table by right-clicking on your table and clicking “Table properties.”
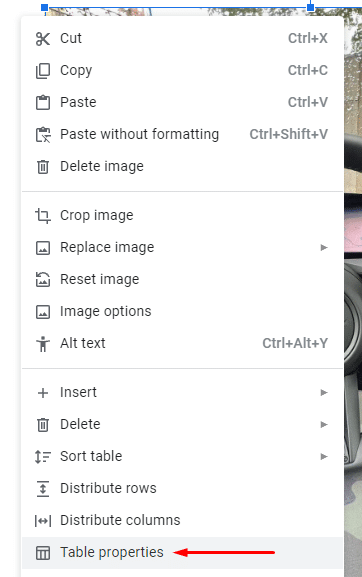
Using the toolbar, you can customize the table’s row, column, alignment, and color.
- If you want to make the border invisible, click the “Color” section under Table properties. Then, on the drop-down menu, set the table border thickness to “0 pt.”
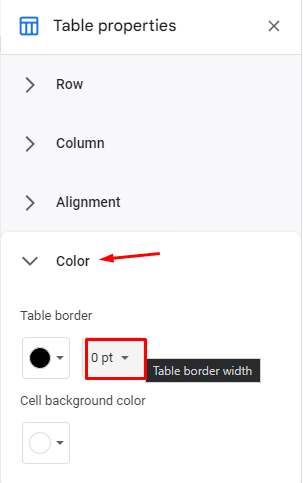
After that, you will see that the table is now invisible.

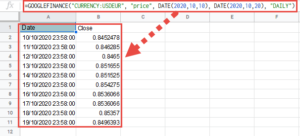
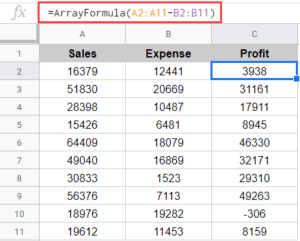
If you’re looking to add a caption to your charts or graphs in Google Docs, you may also find it useful to save your chart as an image using Google Sheets. Check out this tutorial on how to save a chart as an image for step-by-step instructions.
How to Add a Caption in the Google Docs App
When working with the Google Docs app on your phone or tablet, you can also use the methods we mentioned on how to add image captions. Google Docs, however, does not have the Drawing tool for the iOS or Android apps and is only available on the Google Docs web version.
Here are different ways on how to label a picture in the Google Docs mobile app:
Adding a Caption with a Table
Adding a caption to your images using a table is a quick and easy method to do on your mobile app. To get started, follow the steps outlined below:
- First, launch the Google Docs app on your mobile device, and open the document you want to add a caption to
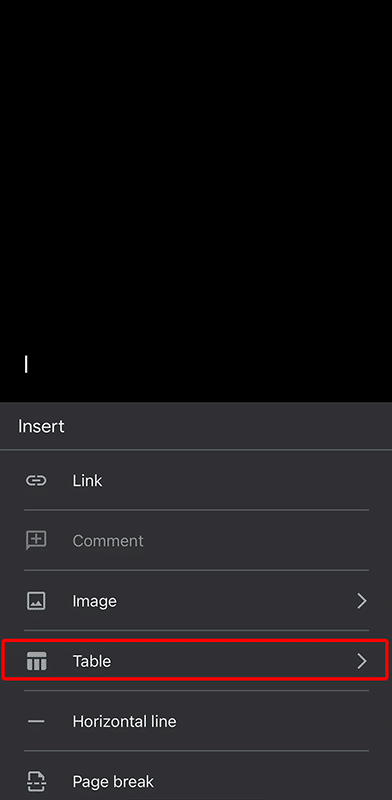
- Select the “Plus” icon on the top-right corner of your document

- Make sure to position your cursor on the part of your document where you want to place your table.
- On the expanded menu, tap “Table.”
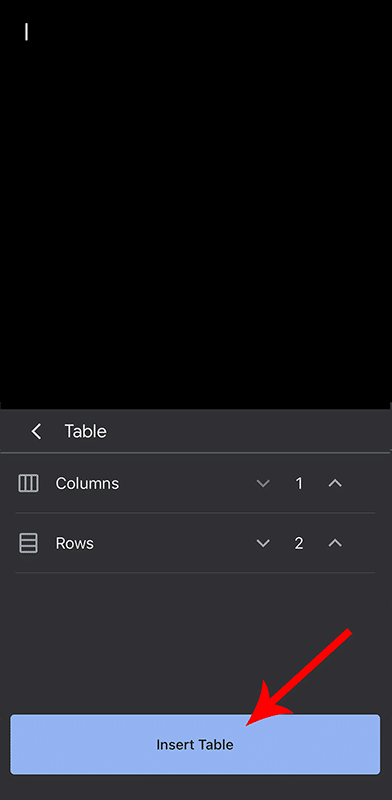
- Choose “1” for Columns and “2” for Rows. After that, tap the “Insert Table” button.
- On the first row of the table you just created, insert your image by selecting the “+ icon” > “Image.” Then, choose whether to upload “From photos” or “From camera.” After that, select your image and tap “Add.”

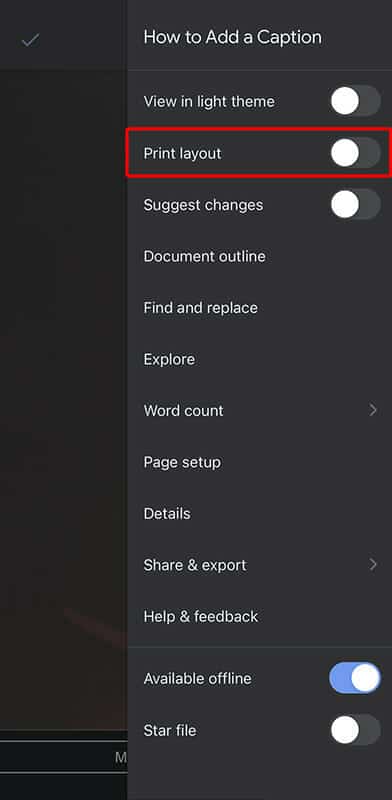
- If you want to resize your image, tap on the vertical three dots icon on the top-right corner of the page to access the menu. Then, turn the toggle on for “Print layout.”
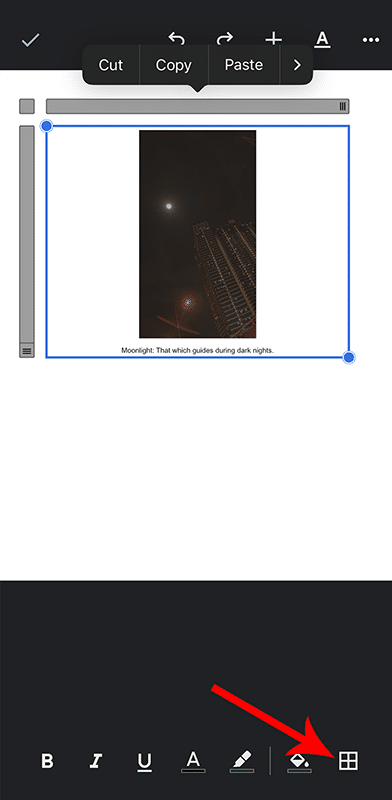
- On the second row of the table, enter your caption.

- Edit the border of your table by selecting your table and tapping the “Borders” icon on the toolbar located at the bottom of your screen.
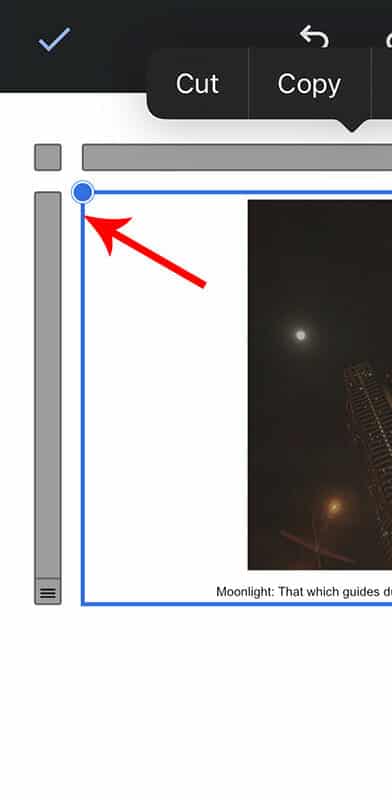
- You can select your table by tapping on the border of your table. This will be indicated by a blue border surrounding your table.
- If you want to make the border invisible, click the “Border width” option and set the table border thickness to “0 pt.”

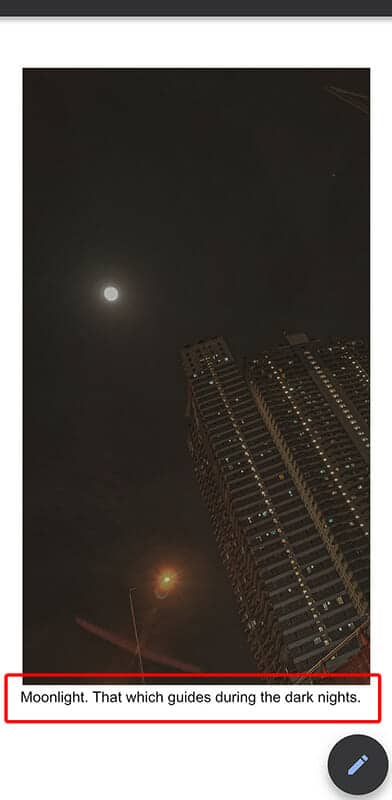
Adding a Caption by Using an In-line Text
Using in-line text is another option to add a caption to an image. Google Docs features different text wrapping options, but this method can be useful for simple documents where you want to keep things straightforward.
Here’s how you can add a caption to your image using in-line text:
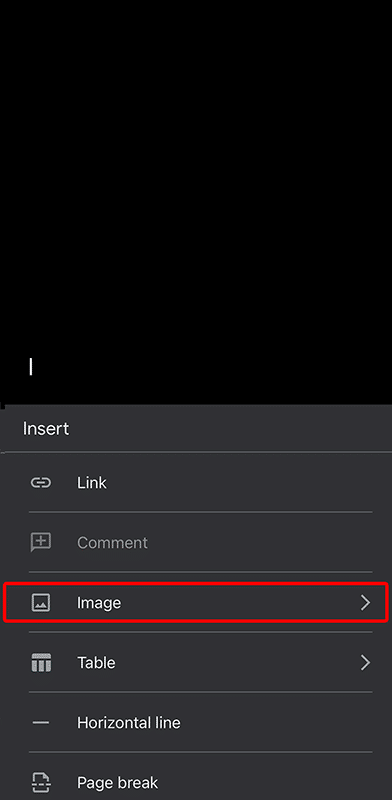
- First, launch the Google Docs app on your mobile device, and open the document you want to add a caption to
- Next, select the “Plus (+)” icon on the main menu.
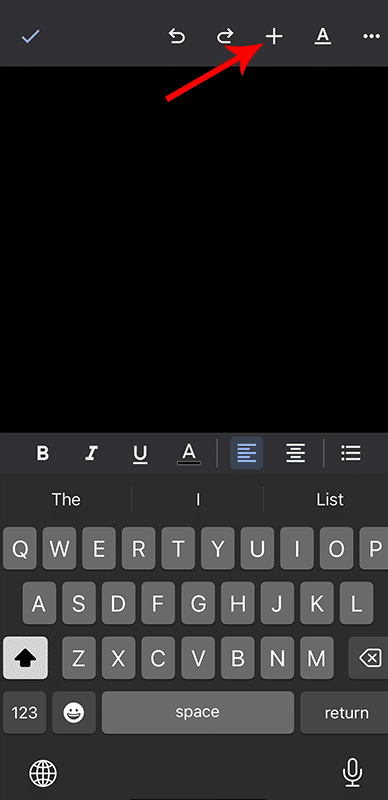
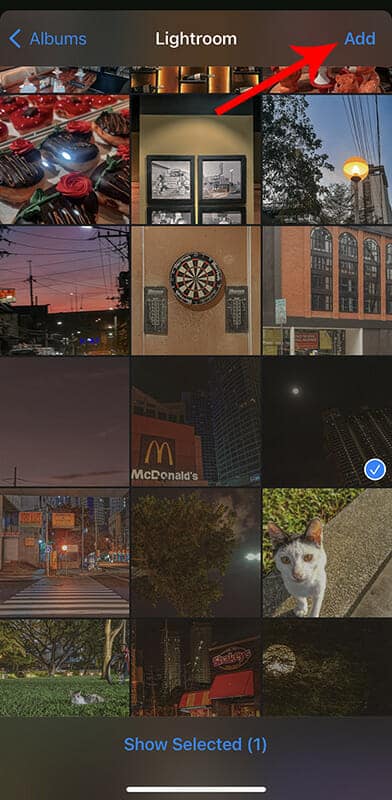
- Select Image. Then, choose whether to upload “From photos” or “From camera.”
- Choose your image and tap “Add.”
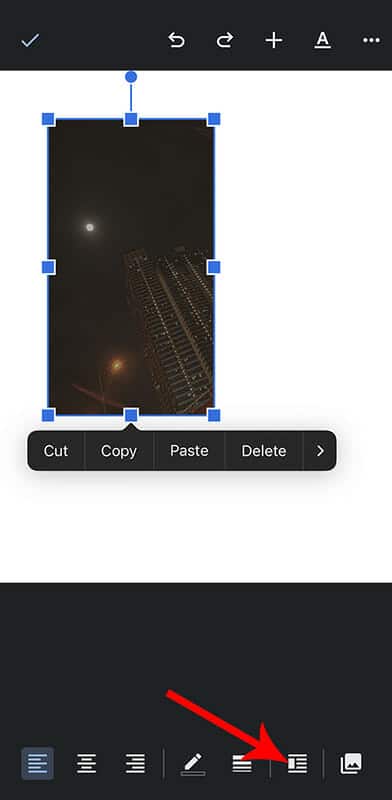
- If you want to resize your image, tap on the vertical three dots icon on the top-right corner of the page to access the menu. Then, toggle on “Print layout.”
- Next, select your image and tap the “Text wrap” icon at the bottom right side of the screen.
- Set the text wrapping to “In-line.”
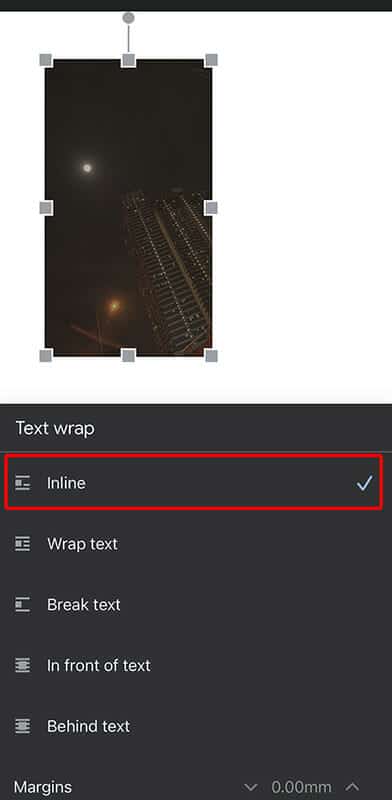
- Finally, enter your caption text below the image.
Final Thoughts
Adding a Google Docs image caption can make your content more informative, organized, and professional-looking. While Google Docs does not currently have an in-built feature for adding captions, there are several easy and creative ways to do so, including using the Drawing tool, in-line text, and tables.
By following the simple steps outlined above, you can create and customize captions for your images in Google Docs in no time.
Related:
- How to Insert Shapes in Google Docs in Under 2 Minutes: Easy
- How to Download an Image From Google Docs (3 Easy Ways)
- How to Draw on Google Docs (2 Unbelievably Simple Ways)
- How to Add Fonts to Google Docs [Step-by-step Guide]
- How to Insert Text Box in Google Docs [Easy Guide]
- How to Flip an Image in Google Docs [Easy Guide]
- How To Make a Venn Diagram in Google Docs (+ Free Templates)
- How To Add a Watermark to Google Docs [Beginner’s Guide]